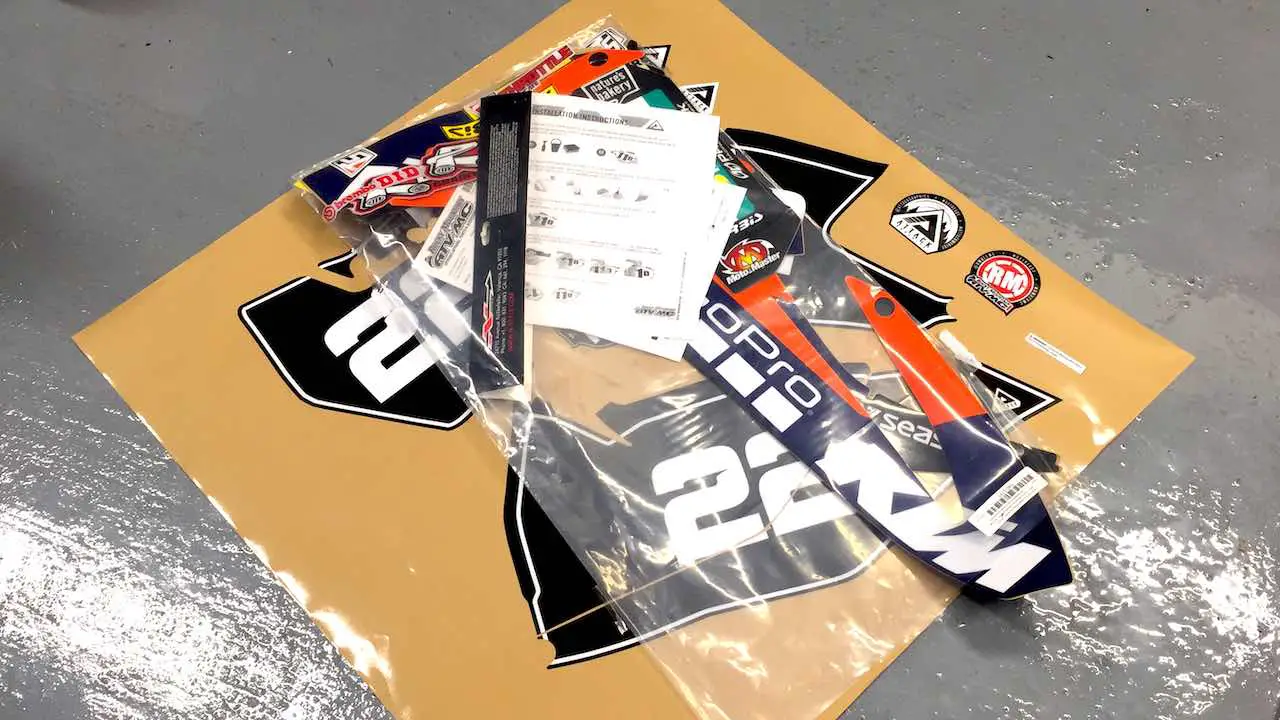
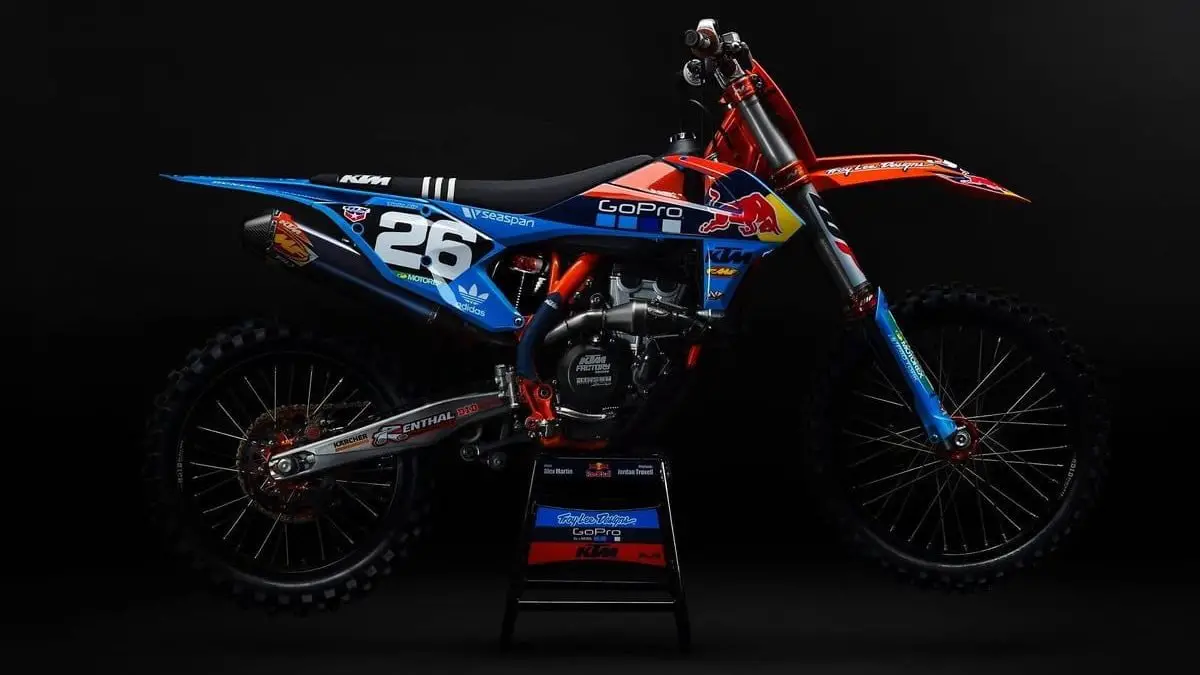
Dirt bike graphics not only serve a functional role but also freshen up the look of your dirt bike. Fortunately, there are many companies producing custom dirt bike graphics, decals, and sticker kits for dirt bikes. Updating your dirt bike graphics is easy and affordable, as most kits are widely available and simple to install by yourself.
Many dirt bike owners choose to replace the plastics and graphics on their new bikes and store the originals for later use. When it’s time to sell, reverting to factory graphics and plastics typically speeds up the selling process.
When considering updating your dirtbike graphics, there are several options to choose from. MX graphics kits and dirt bike graphics kits provide a comprehensive overhaul of your bike’s look, while custom dirt bike decals offer a more personalized touch. With so many options available, it’s easy to find the perfect design to make your dirt bike stand out on the track or trail.
In summary, updating your dirt bike graphics or decals is an easy and affordable way to add a unique touch to your ride. With custom sticker kits, graphics kits, and more, you can create a personalized look that will turn heads on and off the track.
In this post, we will discuss the following topics:
Let’s get started!
What Are Dirt Bike Graphics?
Dirt bike graphics are the thick stickers or decals that are installed on top of the dirt bike plastics. They are model specific sets that are designed to fit the exact year and model of your dirt bike.
There are several types of graphics kits available in a wide variety of colors, designs, and sizes. Some cover only a portion of the plastics and some contain dirt bike decals for the entire dirt bike.

For example, full sticker sets include specific ready-cut stickers or decals for the front and rear fender, front fork deflectors or protectors, both side panels, and air box cover, as well as the front number plate.
In some sticker sets, you can customize the number plates on the side and front of the dirt bike with your name and or number to make them more personal.
How Are They Made?
Dirt bike graphics are typically manufactured by laser cutting vinyl sheets into predesigned layouts and designs. The vinyl is by far the most common material.
They vary in design as well as in thickness and finish. The available material thicknesses typically vary between:
- Lightweight or thin: 12 mil or 300 microns (micrometers)
- Medium: 16 mil or 400 microns
- Heavy: 21 mil or 533 microns
- Very heavy: 32 mil or 812 microns
Generally speaking, the thicker the graphics vinyl material used is, the more expensive and wear resistant the graphics are but also more difficult to install.
The vinyl and the graphics are also made in matte or gloss finish and some graphics or dirt bike decals may be perforated. An example of the perforated graphics is the section used around the tank and the radiator shrouds. The perforation helps preventing bubbles and allow gas fumes to dissipate better.
How Do the Graphics Affect Your Dirt Bike?
Besides the most obvious function of making your dirt bike look cool, the graphics have also several important practical and functional roles.
Now, let’s take a closer look at how graphics can serve your dirt bike.
1. They Protect the Plastics From Wear
One of the main functional roles of dirt bike graphics is the added protection against the wear and tear of the dirt bike plastics as well as some painted parts and the frame. Especially the thick graphics will protect the plastics against scratches and other smaller scuffs, dings, and cuts.
The front forks tubes, rear swingarm, and other parts can also be protected with correctly installed and positioned thick graphics material. You can also buy transparent sheets of protective vinyl to add protection to areas prone to wear and tear.
2. Graphics Modify Friction in Connection Points With the Rider
Another important functional role of the graphics is to control the friction in all contact points with the rider.
You may have noticed that some riders add abrasive stickers on their dirt bikes, usually near where boots contact the dirt bike frame. This is to add friction, which makes it easier to keep the correct riding position.
Additionally, some riders may prefer smooth graphics kits around the tank and the radiator shroud area, whereas some may prefer more sticky or abrasive graphics set. The former reduces friction and increases the sliding of the rider on the bike and the latter the opposite.
This is a personal preference, but you should be aware that the type and finish of the graphics can be used to alter friction around the dirt bike.
3. They Prevent Dirt and Mud Buildup on the Plastics
The graphics generally help to drop any dirt buildup around the dirt bike. Furthermore, the plastics are typically much more rough in finish and tend to gather dust and debris. The smooth finish in graphics and the vinyl materials used effectively shake most of the dirt buildup and help with keeping your dirt bike cleaner and lighter.
You can also use different style plastic protection and conditioning sprays to make the plastics and graphics more dirt proof. These sprays are similar to the materials car dealers use to make the car tires look like new.
4. Protect the Plastics From the Sun’s UV Radiation
The UV radiation from the sun eats up plastic like nothing else. The graphics can help to protect the plastics from direct sunlight and thus extending the plastic’s lifespan. This is because the sun’s UV radiation breaks down the plastics slowly making them brittle.
What Is Included in Different Kits?
There are several different kind of dirt bike graphic kits available in a variety of styles, shapes, and colors.
If your plan is to change to a new plastics kit or renew all graphics, naturally you need to buy a full graphics kit. However, you can also buy smaller sets to replace only certain parts or sections on the dirt bike.
Let’s look at the available options next.
Full Kits for Dirt Bikes
A full kit includes decals and stickers that cover all of the plastics in a dirt bike.
Most full kits include stickers that will cover the front and rear fender, front fork deflectors, front fork tubes, swingarm sides, both side panels, and air box cover, plus the front number plate.
Trim Kits
A trim graphics kit is a partial kit that includes dirt bike decals for both the front and rear fender, fork tubes, and fork deflectors.
Radiator Shroud Kits
Like the name implies, a radiator shroud graphics kit includes the sticker set that covers the plastics around the tank and the radiator shrouds.
Number Plate Kits
A dirt bike number plate graphics kit includes the front number plate and sometimes also the side number plate. They can be just backgrounds or include your race number and/or name.
5 Tips for Selecting the Best Graphics for You
When choosing the correct graphics kit, there are few important things to consider. Below, we compiled a list of things that you should pay attention to when selecting the best dirt bike graphics kits.

1. Check the Material Thickness
Graphics are made in different thicknesses and materials. And the truth is that cheap, thin stickers will not last more than few rides. The normal stickers that you get when you buy new gear or bike parts are not made of the material that will last in dirt bike riding. They are mostly decorative and sure can be used in addition to the base graphics set.
A good graphics kit uses a material thickness of 16 mil (400 microns) or more. Anything below the 16-mil thickness means that the graphics are cheaper and will not last as long as the thicker ones. The 16-mil thickness is still considered as a medium thickness.
The functional purpose of the graphics kit is to protect the plastics from scratches and help with controlling the friction between the rider and the dirt bike surfaces. If the material is not thick enough, this purpose will not be fulfilled.
2. Verify the Fitment for Your Dirt Bike Model
Make sure that the dirt bike graphics kit is specifically designed for the make and year model of your dirt bike. The dirt bike submodels have small differences, which makes the plastics fit differently. This affects how the graphics are laid out and cut to match the plastics mounting points, size, and contours.
For example, ordering a XC vs XCW kit for KTM means that you get different front plate and swingarm stickers and you also would not get number plate decals with the latter one.
3. You Can Mix and Match Graphics Kits
If you don’t find a graphics kit to your liking, you can mix and match several kits to create cool and unique dirt bike graphics designs.
The available kits we mentioned previously can be used to personalize the dirt bike to your liking or replace only the worn-out graphics on your dirt bike.
4. Design Your Own Custom Dirt Bike Graphics
For a full custom look, go for graphics that you can alter or redesign by yourself. Many of the vinyl graphics companies allow you to at least modify or completely design your personal kits.
5. Read Reviews
Check reviews for wear and tear, installation easiness, and fitment. Reviews usually help determine the overall quality of the set. If you cannot find the material thickness, ask first. If unsure, don’t buy it.
New Graphic Kits for Your Dirt Bike
All right, so you’ve found a graphics or decal kit for your dirt bike that you like. Before you can install the new graphics, you first need to remove the old ones, clean the plastics, and restore any worn-out plastics.
The whole process will take approximately 2 to 3 hours. It sounds a lot but it will definitely be worth it since your dirt bike will look like new afterwards! Also, you can divide the installation process into two parts if needed: you can remove the old graphics on the first day and then install the new kit the next day.
For more detailed instruction on how to install graphics, take a closer look at these step-by-step installation instructions on how to install dirt bike graphics on your dirt bike.
Top 3 Best Dirt Bike and MX Graphics Companies
Many dirt bike and MX graphics companies manufacture and sell dirt bike graphics, stickers, and decals. Some of the graphics are of better quality than others, so we understand it might be hard to decide which one to go with.
That’s why we wanted to list our top 3 choices for the best dirt bike and MX graphics companies. All of these three companies make model specific, high-quality, and cool looking dirt bike graphics. Their graphics are available in a variety of styles, shapes, and colors so you will surely find one to your liking from their selection.
We personally have used Attack Graphics and Rival Ink graphics kits with great success.
1. Attack Graphics
Owned by Rocky Mountain ATV/MC, this Utah based graphics company makes high quality graphic kits for many popular dirt bike brands, such as KTM, Honda, Husqvarna, Kawasaki, Suzuki, Yamaha, and other UTVs.
You can customize your graphics kits with rider I.D. and personal number plates.
You can make the order directly from Rocky Mountains website by clicking here.
2. SDKA
This Australian company shipping worldwide makes a variety of graphics for dirt bikes. Among with the most popular brands, they also offer graphics for unique designs as well as pro/team replica kits.
The company has a 1 to 2 week delivery time from order to your door. Check the SDKA website for mode details.
3. Rival Ink Design Company
Rival Ink, another Australian company also having its office in Temecula USA, offers a large selection of graphics options for most dirt bikes and they do a lot of custom work to fit them to your dirt bike model. They offer a free worldwide delivery for larger orders.
Rival Ink seems to take a more custom approach to the graphics designs and putting the graphics kits together.
You first choose the general design you like, then go through several selections and add optional items. Next, you can add name and numbers and customize it to your liking. Additionally, the full kits include 2 proof rounds, where you can make adjustments prior to accepting the final results.
Check out the Rival Ink Design Company website here.
How To Get Fully Custom Graphics
Did you know that you can create a fully custom dirt bike graphics kit for your dirt bike using your own pictures and designs?
Some of the graphics manufacturers offer fully customizable graphic design services, including other parts of the dirt bike, such as seat covers, handlebar pads, rim stickers, and smaller decals.
In normal predesigned graphics, you can add your number and name to the front and side number plates. For further customization, you can use companies that offer personalized design services, like the Rival Ink Design Company mentioned above.
They can help you to get your fully custom dirt bike graphics kits by directly using their website and uploading your own pictures and logos, or contacting them and using their design services to create your unique personal or team graphics.
How To Choose Your Race Number
If you are a beginner rider and haven’t yet used a race number, let’s discuss some of the principles and meanings behind the numbers on a dirt bike.
The front plate, side plate, and jersey race numbers are normally related to dirt bike racing. They are typically a number between 1 and 999, sometimes combined with a small letter. These numbers are usually included in the full graphics kits and can be personalized.
These race numbers are typically assigned to you during the first race you attend. Some riders stick with the first number and drop the third and second digit as they level up in classes.
Generally speaking, the higher the number is, the lower the rider is in classes and achievements in terms of race results. For example, the best riders in the world have numbers between 1 and 9 and these numbers are usually assigned based on the previous season’s overall standings and overall career performance.
Now, how about amateur riders? How do we mortals pick a race number?
Join a race. If you wish to have a race number in your dirt bike and don’t just want to pick a random number, attend a race! They will assign you a number, which is most likely going to be a three-digit number. This way your number will have a meaning and you will appreciate it more. Once you progress and keep racing, you can drop the tail digit for a shorter two-digit number.
Some say that three-digit numbers represent beginner riders, higher two-digit numbers are A riders and low two-digit or one-digit numbers are for the pro-level riders. This is a general guideline.
Frequently Asked Questions (FAQs)
How do I install dirt bike graphics?
Installing dirt bike graphics is relatively easy. In short, clean the surface, peel off the backing, align the graphics, and apply pressure to ensure adhesion. Using a heat gun can help with proper positioning and smoothing out any wrinkles. Take a look at this step by step guide on how to install dirt bike graphics.
How long do dirt bike graphics last?
From personal experience, several years and few hundred riding hours. With proper installation and maintenance, dirt bike graphics can last for several years. However, their longevity can vary depending on factors like riding conditions, cleaning methods, and exposure to sunlight and chemicals.
Can I remove dirt bike graphics without damaging the plastics?
Yes, dirt bike graphics can be removed without causing significant damage to the plastics. Use a heat gun or hairdryer to warm the graphics, and then carefully peel them off. Any remaining residue can be cleaned using adhesive removers or rubbing alcohol.
Do dirt bike graphics affect performance?
Dirt bike graphics themselves do not directly impact performance. However, the graphics will work as a protective layer for plastics and affect the friction in your knee area when pushing against the dirt bike. This helps in controlling the dirt bike and thus has a positive effect on riding performance.
Can dirt bike graphics protect the plastics?
Yes, dirt bike graphics can provide an additional layer of protection to the plastics. They act as a barrier against scratches, minor impacts, and UV rays, helping to preserve the aesthetics and prolong the life of the plastics underneath.
Conclusions
Dirt bike graphics are a great way to personalize your dirt bike and stand out from the crowd. The custom graphics for fort bikes are easy to install, last a long time, and help to protect your dirt bike.
While most people buy graphics just to make the dirt bike look cool, it is important to keep in mind how the graphics affect the dirt bike riding performance and plastics durability.
Keep your dirt bike looking fresh!
Read next:

