The 2 stroke top end rebuild is one of the bigger maintenance tasks and it requires a bit more work than what some riders are used to. Nonetheless, it is something that you can easily perform by yourself.
Performing a 2 stroke top end rebuild basically means swapping out the piston on your dirt bike. The process involves removing certain parts to access the motor top area, flushing the coolant system, removing the head and the cylinder, replacing the piston, and reassembling the dirt bike.
A top end rebuild takes overall about 4 to 6 hours to complete and it is something you should do every 70 hours depending on your bike and your riding style.
In this post, you will find out:
- How much a 2 stroke top end rebuild costs
- How often you should rebuild a 2 stroke top end
- How to perform a step-by-step 2 stroke top end rebuild
- Tools and parts needed for the rebuild
- How to prepare the dirt bike
- How to remove the old piston
- How to inspect connecting rod bearing play
- How to install the new piston
- How to reassemble the motor
- How to break in a top end rebuild on a 2 stroke
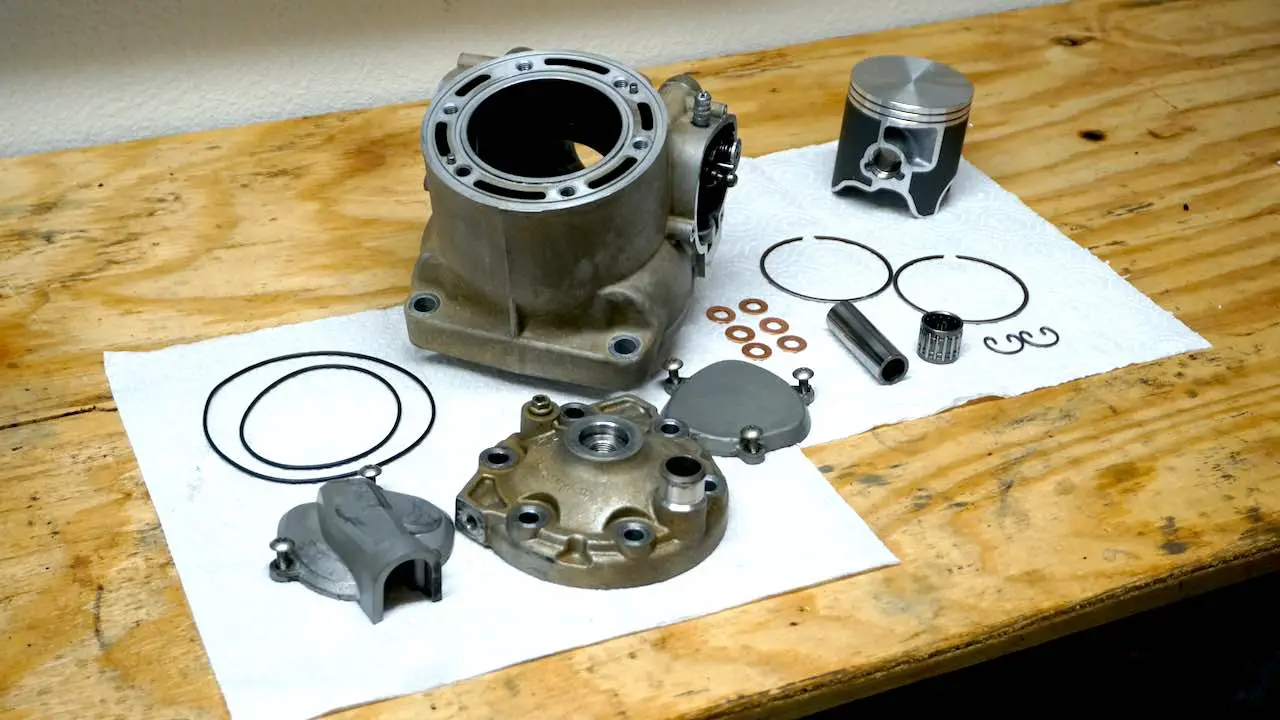
Next, we will explain the main steps involved in replacing the piston and highlight what you should clean and inspect during the 2 stroke top end rebuild process.
These step-by-step instructions are specific to a dirt bike model 2018 KTM XC-W 300.
However, these instructions are the same for Husqvarna TE 300 2017-2018, KTM 300 XC 2017-2019 and, 300 XC-W 2017-2018 models. Other 2 stroke engines are very similar and these instructions should help you understand the basic steps required to perform a 2 stroke top end rebuild on any 2 stroke engine.
Let’s get started.
This post contains affiliate links. If you use these links to buy something we may earn a commission at no additional cost to you. As an Amazon Affiliate we earn from qualifying purchases.
How Much Does a 2 Stroke Top End Rebuild Cost?
Complete 2 stroke top end rebuild kits typically cost around $200 to $250. If you install the parts yourself, you are looking at great savings as you don’t need to pay for the service hours that can add up quickly. In addition to the kits, you will need refill engine coolant, such as Engine Ice, which costs around $25.
When you order a top end rebuild kit, pay attention to what the kit actually includes. We have successfully used this Vertex 2-Stroke Piston Kit now several times and can strongly recommend it. It comes with everything you need to complete the top end rebuild. Find your own model specific 2 stroke top end rebuild kit here.
2 Stroke Top End Rebuild Kits
You can find full 2 stroke top end rebuild kits for most dirt bikes. These rebuild kits usually include everything you need. Alternatively, you can get the piston, piston rings, bearings, and the gaskets as separate kits.
How Often Should You Rebuild a 2 Stroke Top End?
It depends on your riding style, riding conditions and how aggressively you ride. Most manufacturers recommend a 2 stroke top end rebuild between 25 to 70 hours. The engine size and how you ride effect how quickly the piston will wear out. Smaller 125cc engines will need more frequent piston swaps where as the 300cc engines usually last much longer.
Another variable is the riding style. If you rev out the engine a lot, race or otherwise spend more time on the gas, such as riding on roads, the piston wears our faster. Riding slower and technical enduro usually means lower revs and less time on the higher engine revolution range, which slows piston wear.
Thirdly, the conditions will affect the piston wear. If you ride in dusty conditions, with lots of sand and other flying debris, make sure to replace and clean air filters often and consider using a sand filter cover.
Generally speaking the bigger engines, such as the 250/300cc engines will last around 70 hours and smaller engines closer to 40 hours between the 2 stroke top end rebuilds.
You can also test the compression using a simple compression tester tool, such as this Motion Pro Compression Tester, and also inspect the piston wear through the exhaust port to assess the wear and tear.
18 Steps for a 2 Stroke Top End Rebuild on a Dirt Bike
A top end rebuild is something you should do every 70 hours depending on your dirt bike and your riding style. Especially if you’re riding hard enduro, this is how often we recommend changing the piston.
The entire top end rebuild process will take overall about 4 to 6 hours to complete. So plan it well and reserve some extra time if this is your first time performing the piston swap.
Just like when performing most maintenance tasks, a clean dirt bike is a must also for this one. It’s also a good idea to clean and prepare the working area so that you can lay out the removed parts and tools without losing anything.
We divided the top end rebuild into 18 high-level steps to demonstrate all the phases involved in the piston swap. Let’s dive in and go them through in detail.
Tools and Parts Needed for a 2 Stroke Top End Rebuild
While changing the piston is a more demanding maintenance task, it can be performed with minimal special tools. All the other tools needed for the task you should find in your tool box.
You will need the following special tools:
- Torque wrench for tightening the head and cylinder base nuts to specifications
- Digital caliper for measuring the gasket thickness
- A top end rebuild kit, such as the Vertex 2-Stroke Piston Kit we used in our 2018 KTM XCW 300
- Also, restock on engine coolant such as Engine Ice
Step 1: Wash the Dirt Bike Thoroughly
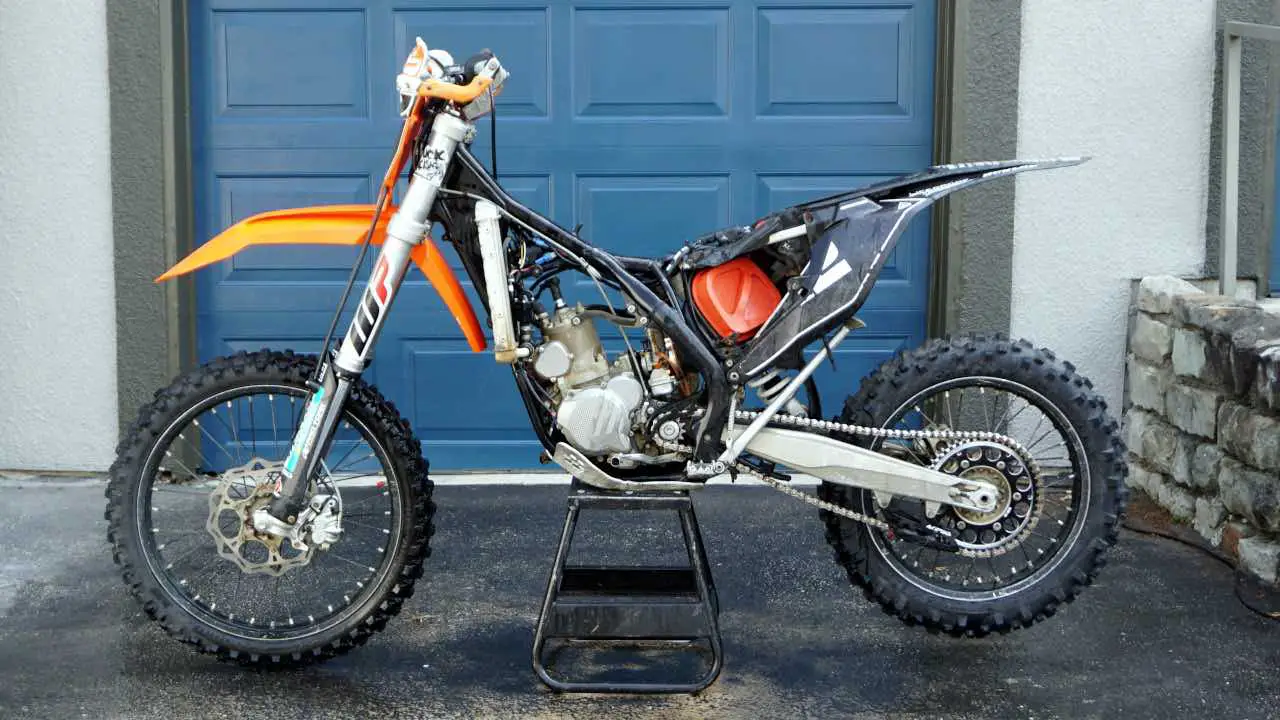
Start by washing the dirt bike. Then continue to remove the seat, air filter, upper dirt bike plastics, gas tank, exhaust expansion chamber, and tail pipe.
Scrub around the motor and make sure to clean the cylinder head and the power valve covers carefully. The head pipe or expansion chamber typically causes some dirt to build up near the right side of the motor in the power valve cover area. This area needs to be cleaned well for an easy top end rebuild process.
Step 2: Drain the Coolant
The coolant circulates around the cylinder head and in order to access the top end area and begin the top end rebuild, we need to drain the dirt bike coolant.
Some dirt bikes will have a drain plug on the right side of the motor, near the power valve cover. Since we need to remove some of the hoses blocking the area to better access the cylinder, the fastest method is to remove the coolant hose under the right side radiator.
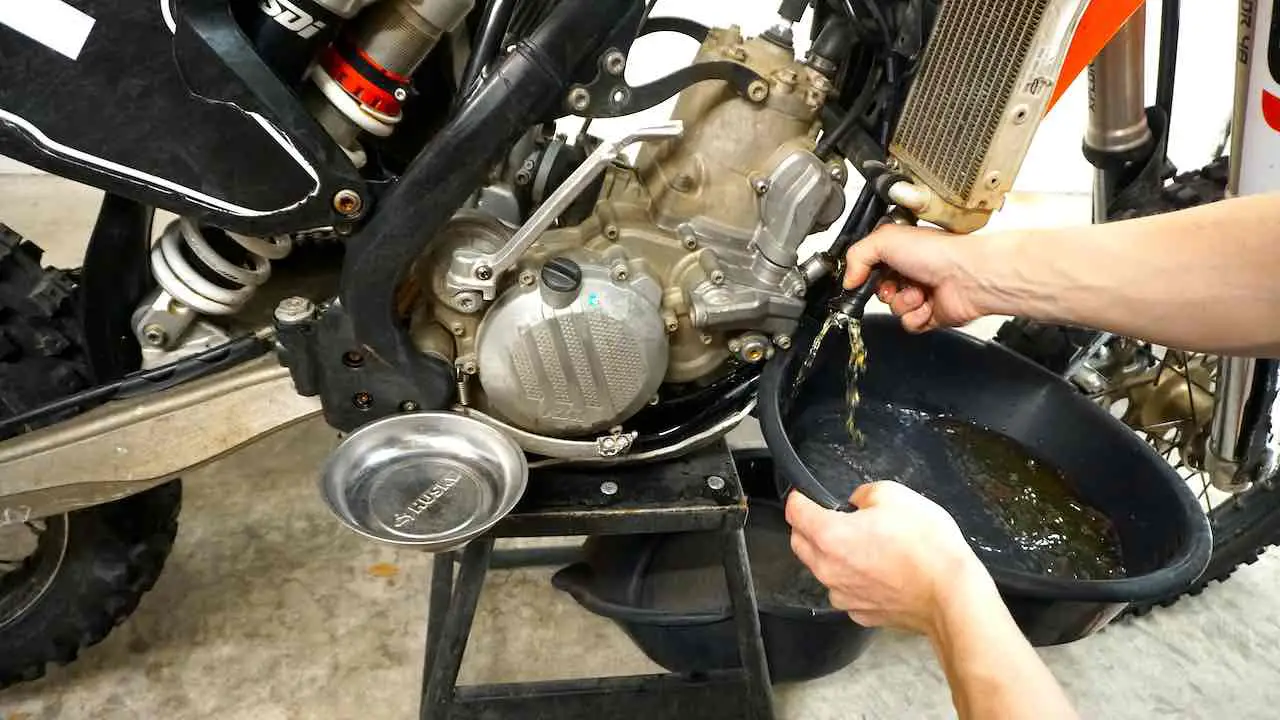
Place a pan under the dirt bike stand and another to catch the old coolant. Slightly rocking the dirt bike will help to empty the remainder of the coolant.
Read also: Dirt bike coolant replacement: everything you need to know
Step 3: Clear Access to the Cylinder
Next, we need to get a clear access to the cylinder and the cylinder head.
In order to access the piston and continue with the top end rebuild, we need to remove the cylinder. And since they all pull upwards, the motor mounts and blocking radiator hoses need to be removed.
Continue to remove the radiator hose between the two radiators. Next, remove the motor mounts on both sides of the engine. Finally, remove the spark plug.
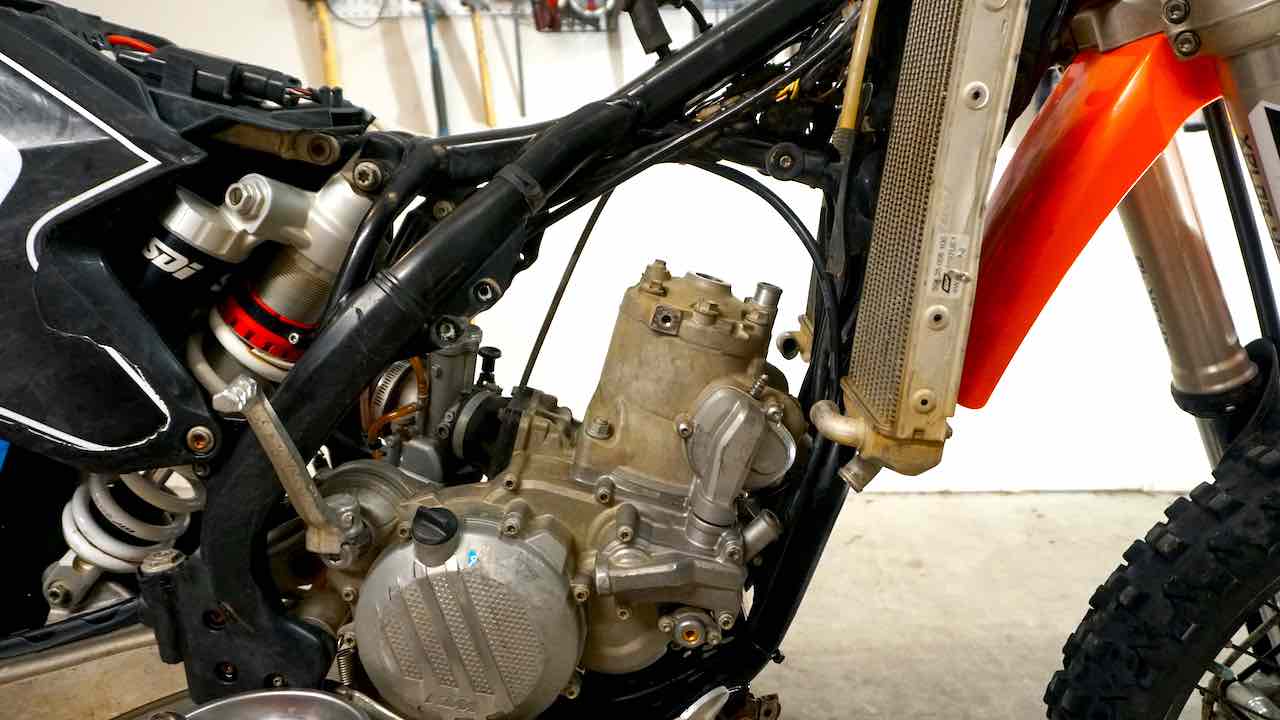
At this point, visually inspect the cylinder head and both power valve cover areas for any dirt or debris. You can clean any remaining dirt with a paper towel and a toothbrush or similar.
Step 4: Remove the Power Valve Covers
Next step in the top end rebuild is to access the piston.
Modern two-stroke engines have a power valve. The power valve controls the size of the exhaust port increasing power delivery. For more information about power valves and how to adjust the power valve, check our guide on how to adjust power valve and why.
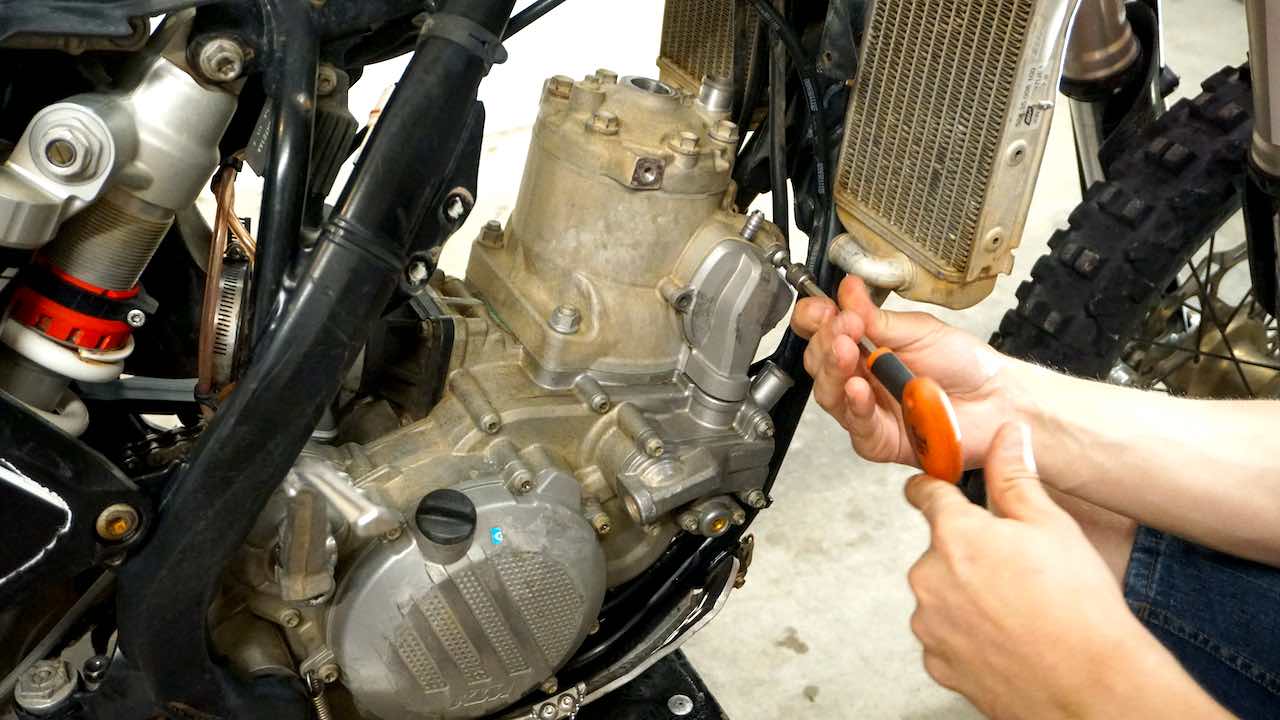
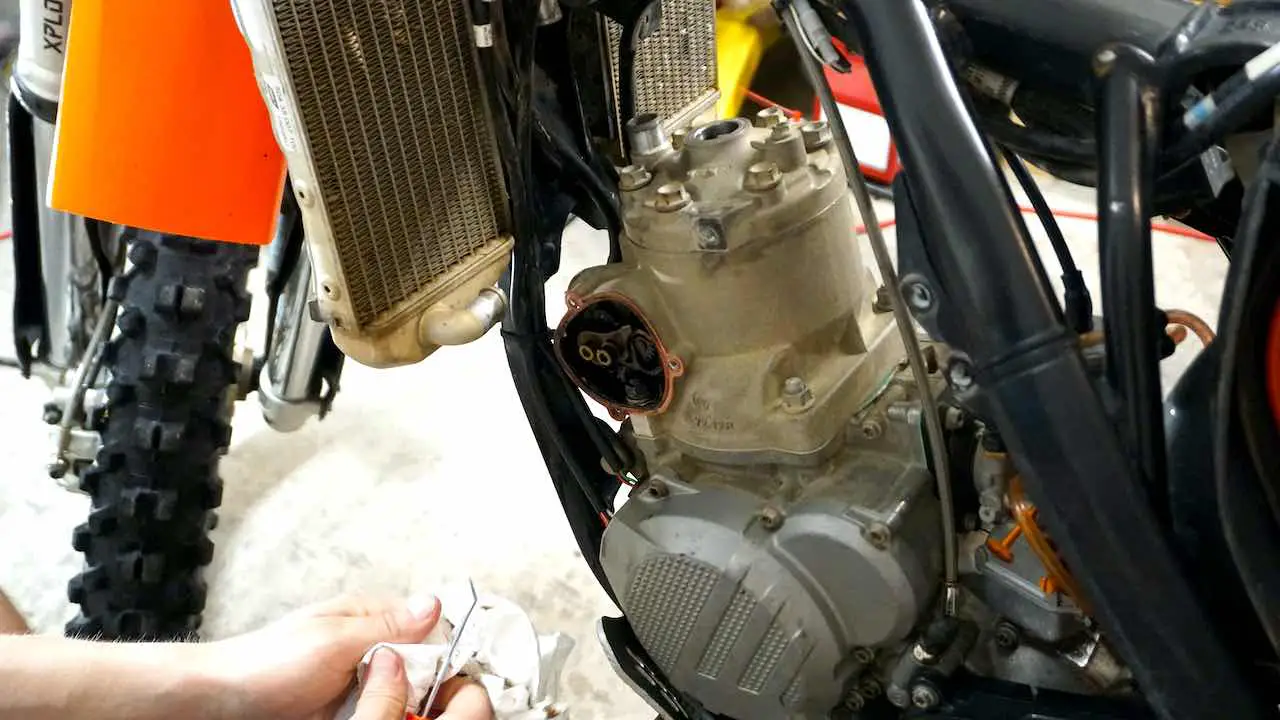
The cylinder typically has two power valve covers, one on each side. The two forward cylinder base bolts reside inside these covers. Next, remove the power valve covers with a T-handle tool to access the cylinder base bolts.
Step 5: Disconnect the Power Valve Push Rod
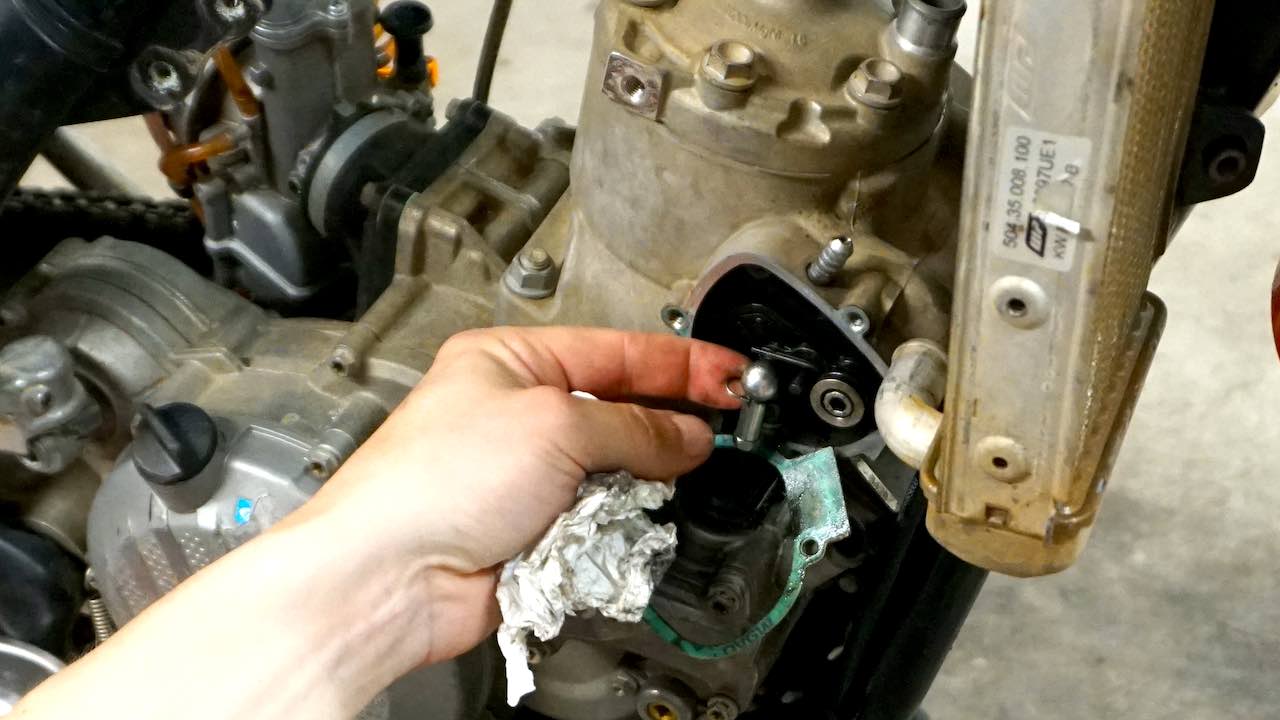
The power valve push rod on the right side is connected to the cylinder power valve assembly. We need to disconnect the push rod. It is held in place by a small circlip.
Rotate the circlip out of the ball point end of the push rod and push down. Once the circlip is off, pull the push rod and it will pop out of the ball joint.
Step 6: Remove the Cylinder Head
Next, we can remove the cylinder head to continue with the top end rebuild.
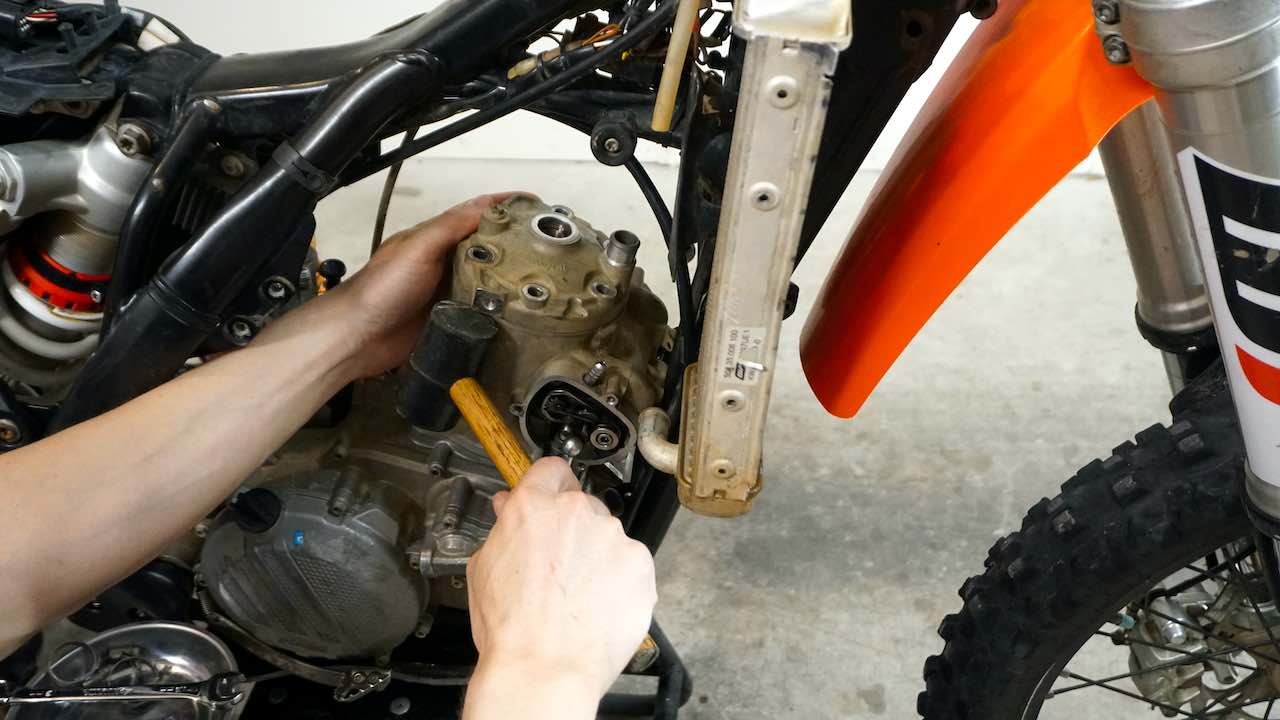
Remove the cylinder head by evenly loosening the head bolts with a box-end wrench. It’s important to loosen the head bolts slowly and evenly to prevent warping in the cylinder head.
If the cylinder head is stuck, you can slightly tap it with a rubber hammer to get it removed.

Step 7: Remove the Cylinder
Next, it is time to remove the cylinder.
The cylinder is held in place by four base nuts, two on the right side and two on the left side. Loosen these base nuts with a wrench. Usually, the two front nuts are located under the power valve covers.
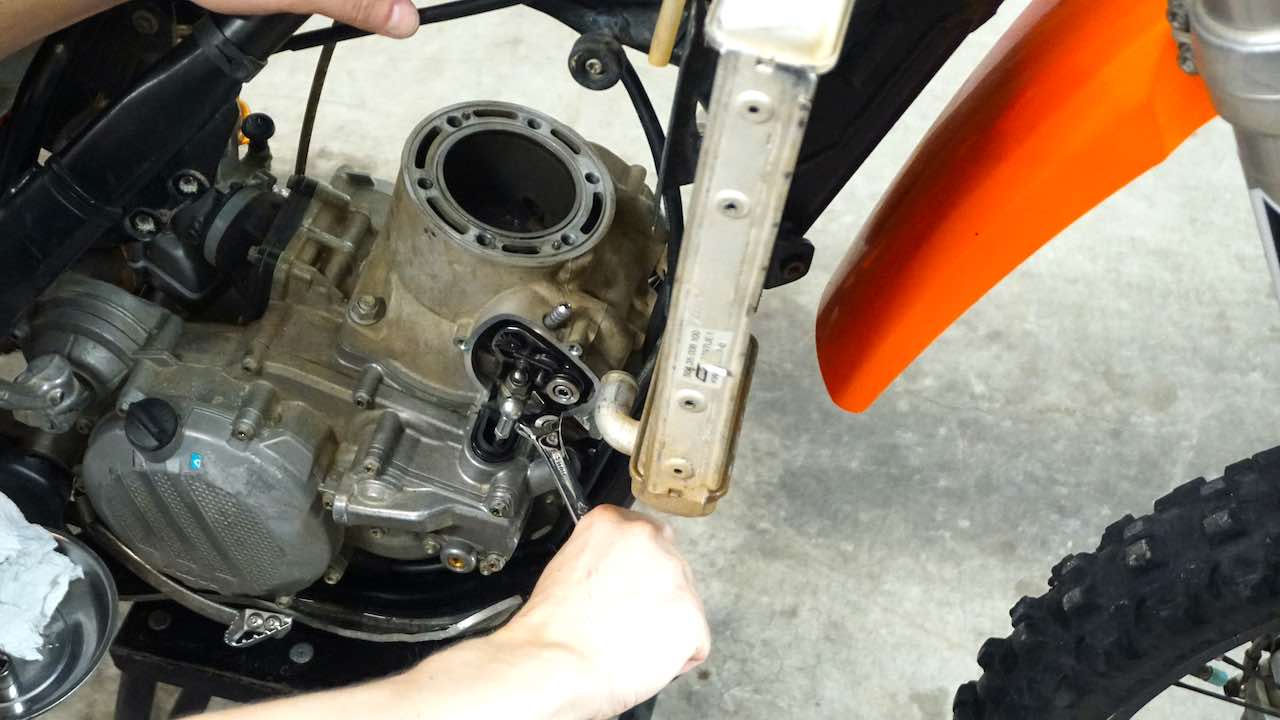
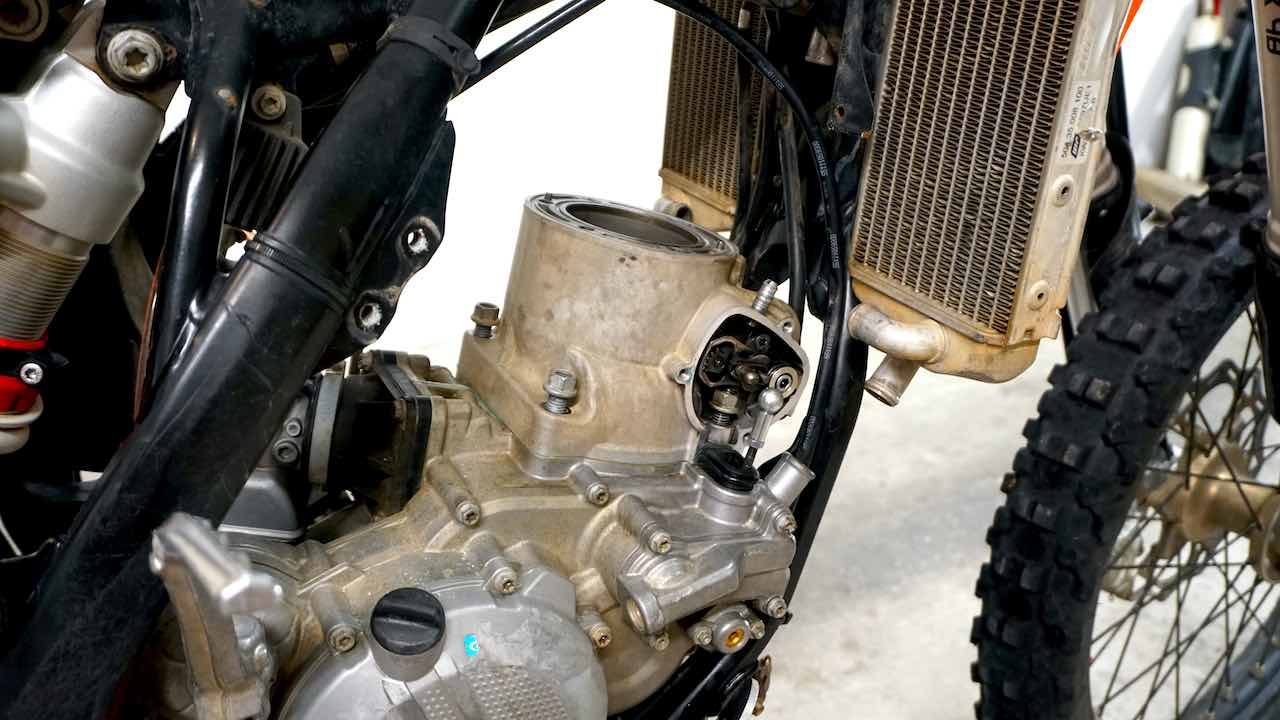
When all four cylinder base nuts are loose, carefully lift the cylinder straight up. Support the piston with your other hand and pull the cylinder out of the motor.
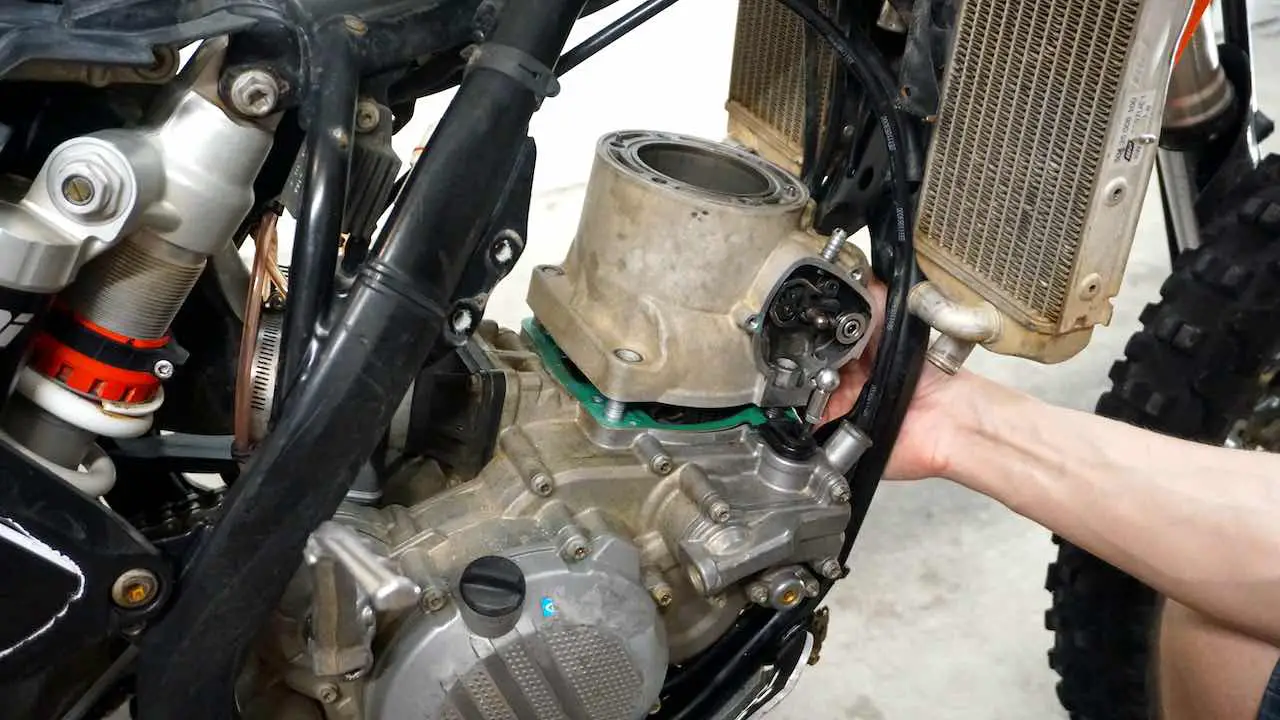
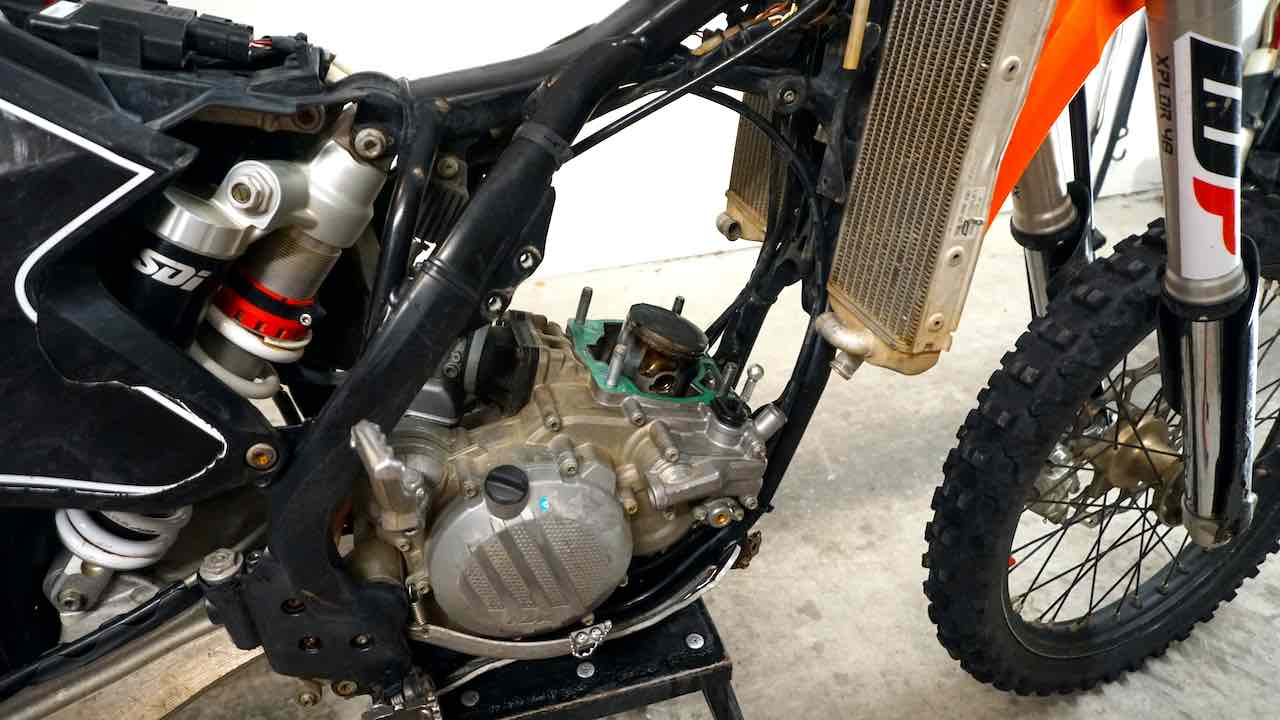
Step 8: Remove the Piston
Now that the piston is accessible, we can remove the old, worn-out piston. This marks a halfway point in the top end rebuild process.
Place a clean paper towel inside the motor to prevent tools, parts, or dirt from dropping inside the motor.
The piston is held in place with two circlips, one on each side. The circlips hold the wrist pin in place inside the piston and one of them need to be removed so that the wrist pin will slide out.
Pry the circlip out whether on the right side or the left side. We have Slavens EZ Clips on our piston so they are easy to remove with just needle nose pliers. After removing the circlip, slide the wrist pin out.
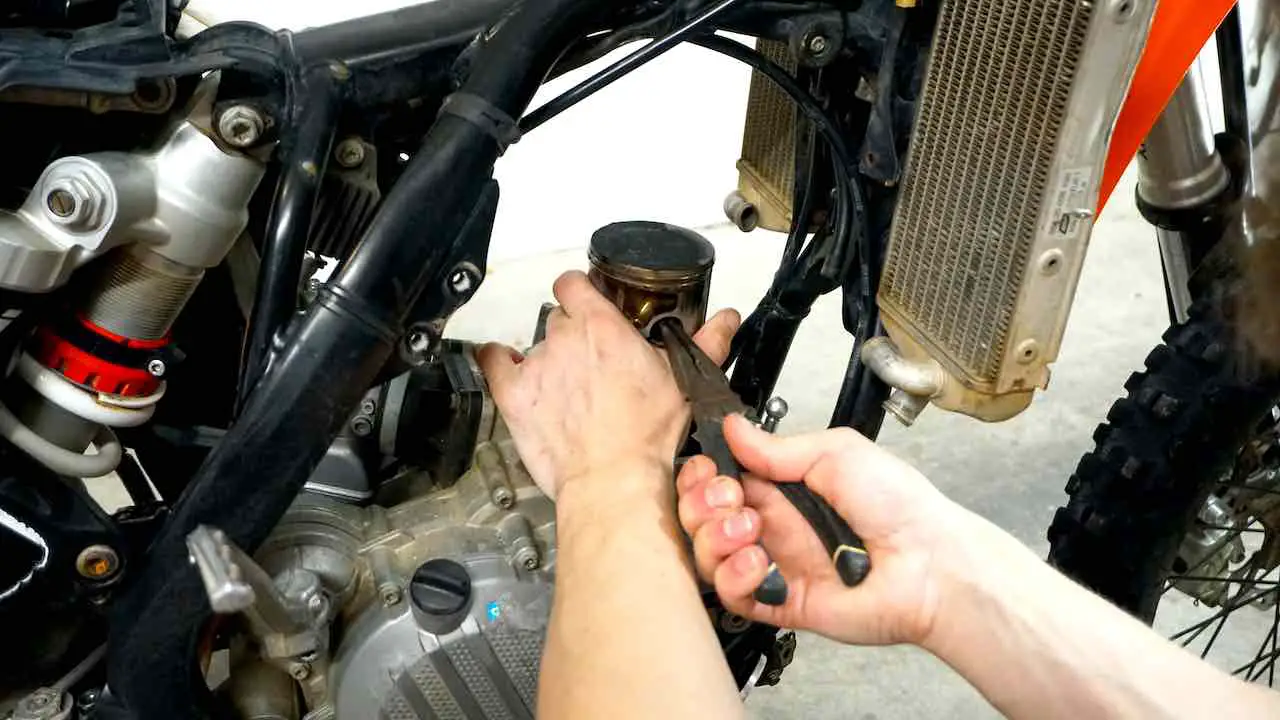
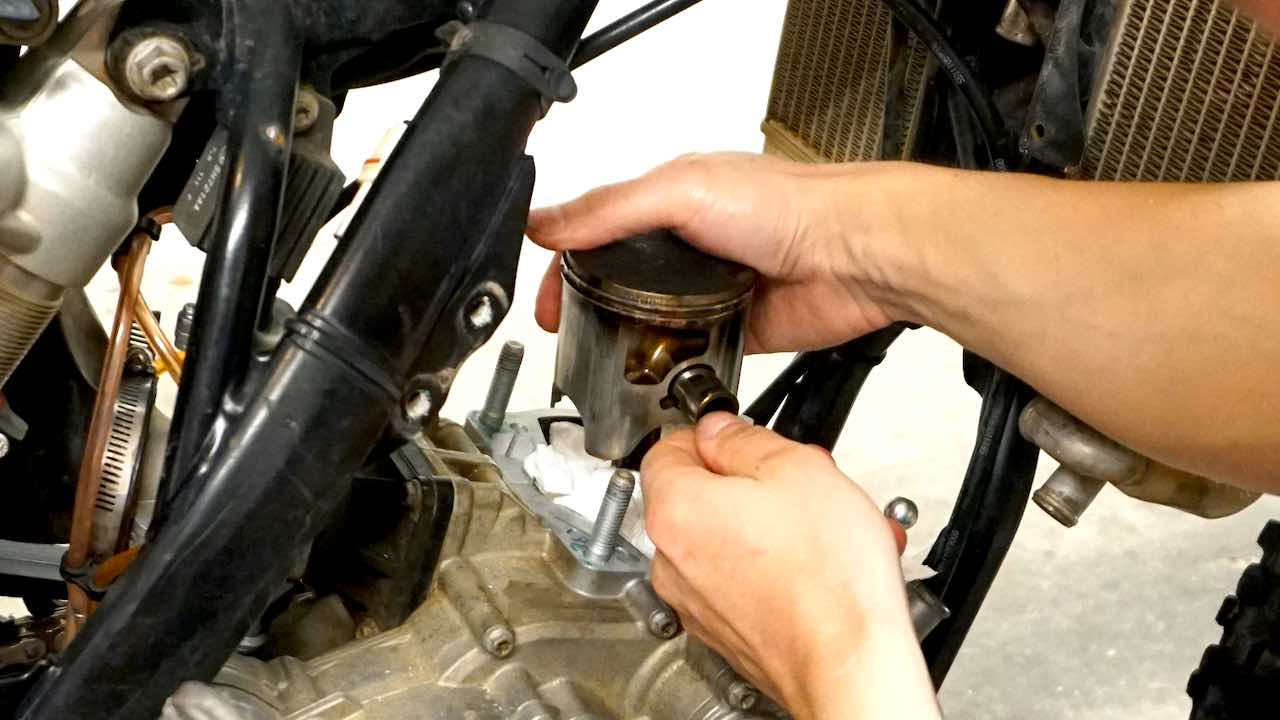
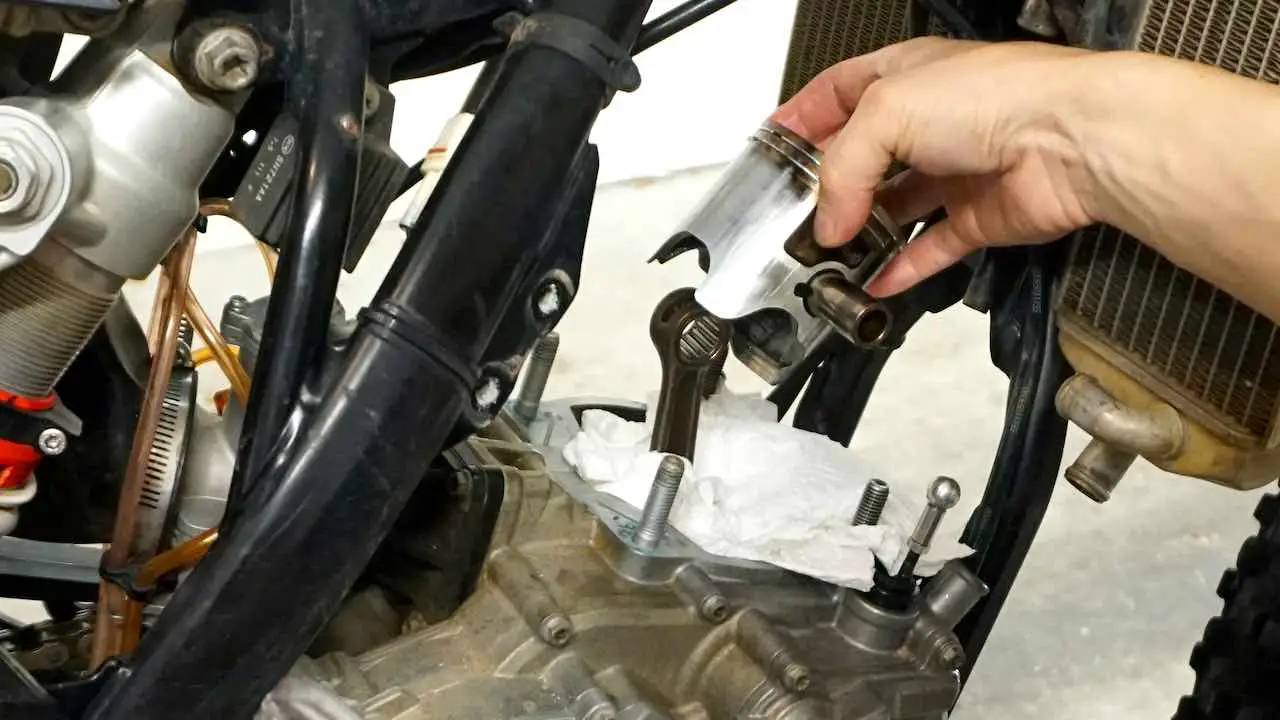
Now that the wrist pin is out, remove the old piston bearing that is installed on the top of the piston connecting rod.
Step 9: Inspect the Main Bearing Play
At this point on the top end rebuild process, we need to inspect the main bearing play.
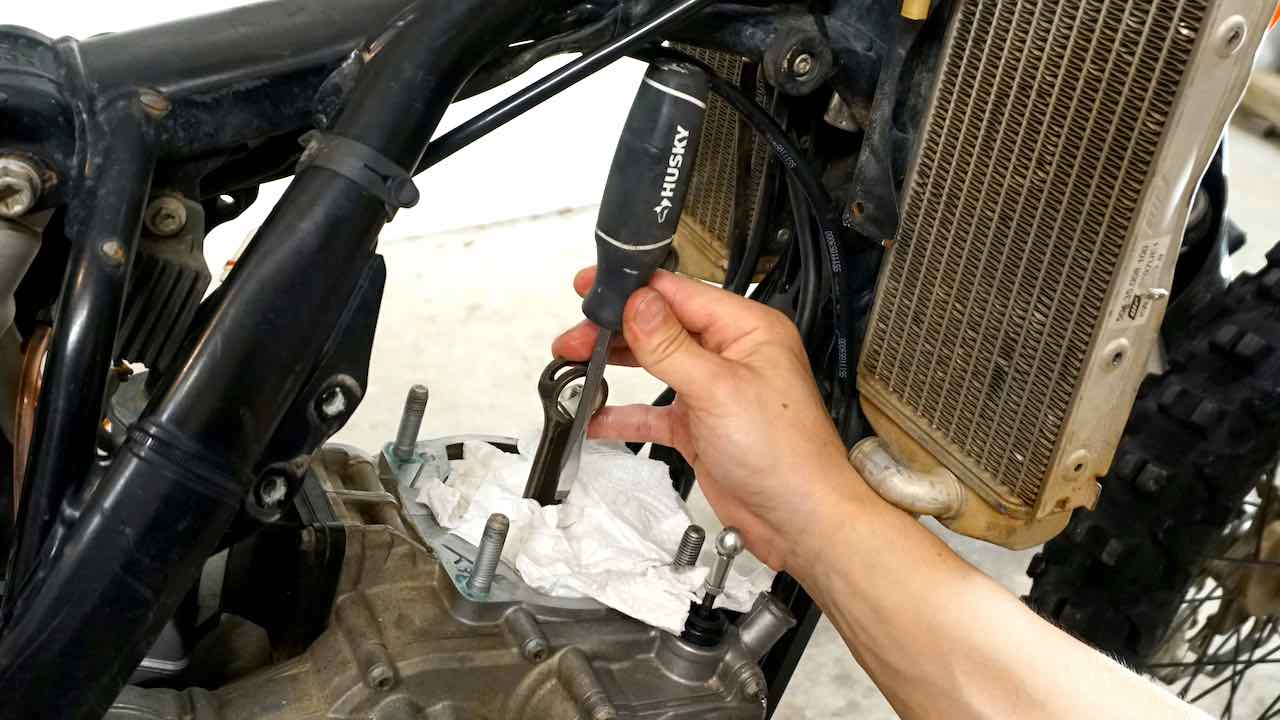
The goal is to test, whether you can feel any play in the direction of the stroke. This means parallel to the screwdriver shown in the picture below.
Grab the connecting rod and by rotating the engine with the kick starter, position the connecting rod to the lowest position. In this position, push and pull the connecting rod up and down. If you feel any play, you need to replace the main bearing.
Step 10: Clean the Cylinder and Cylinder Head
Next, clean the cylinder and cylinder head well. Any dirt makes the top end rebuild process more difficult and may cause issues in the reassembly.
The power valve tends to build up carbon and oil residue. Use a pan and the good old toothbrush or similar with some degreaser to remove any dirt inside the power valve assembly.
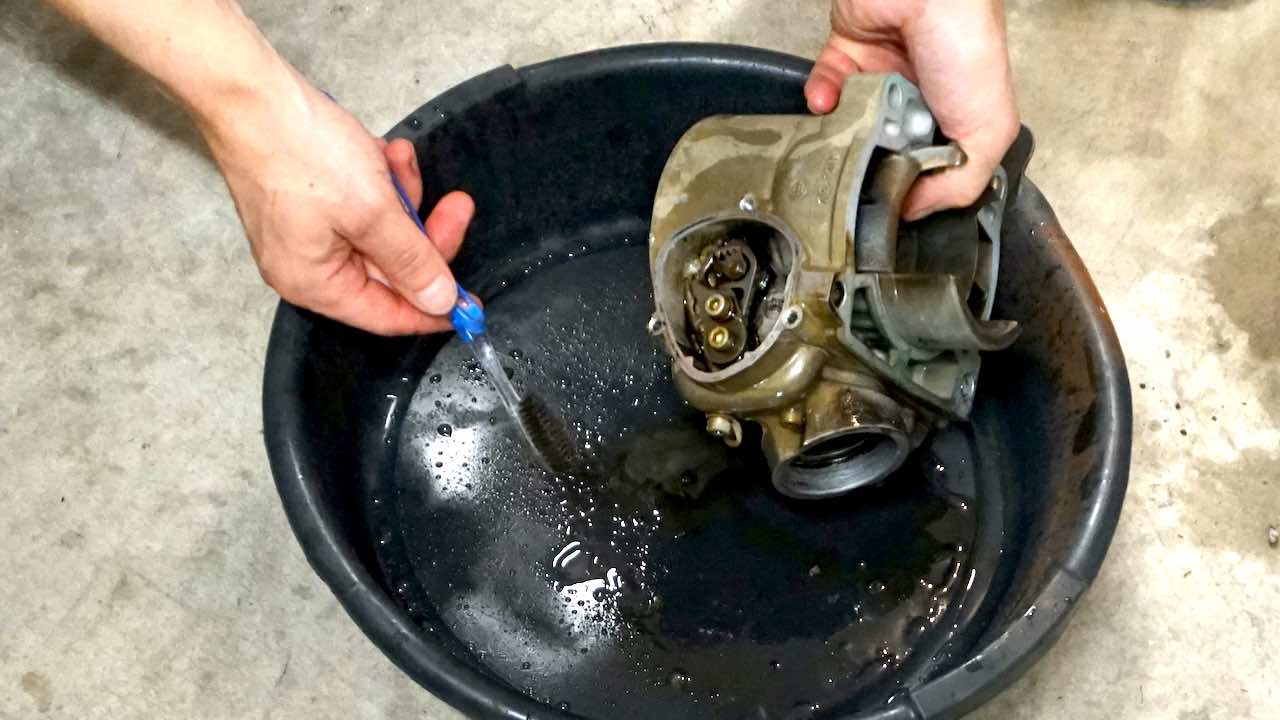
Brush off all of the old gasket residue and any areas that may cause the new gaskets and covers to leak. You can use a very fine sand paper to clean off stubborn gasket residue.
Check that the power valve is moving easily and that the exhaust port flap is clean. In most cases, you will have carbon residue on the power valve itself, which you can clean with the toothbrush and degreaser. Sanding it down or scraping may also be required to clean it completely.
Step 11: Measure and Install the New Base Gasket
The top end rebuild process and reassembly continues with choosing the correct base gasket.
The base gasket thickness affects the compression. The top end rebuild kits come with several standard base gaskets thicknesses and it’s your job to select the correct ones to match the old thickness.
KTMs come with two base gaskets out of the factory and while they may seem like only one gasket, you can pry the old ones apart and measure them separately to find a good match.
We measured the combined thickness with a digital caliper and while the service manual and stock calls for 0.7mm, we measured the old at 0.67mm. Matching the old thickness, we found that our top end rebuild kit has 0.5mm and 0.17mm base gaskets that will fit perfectly to our motor.
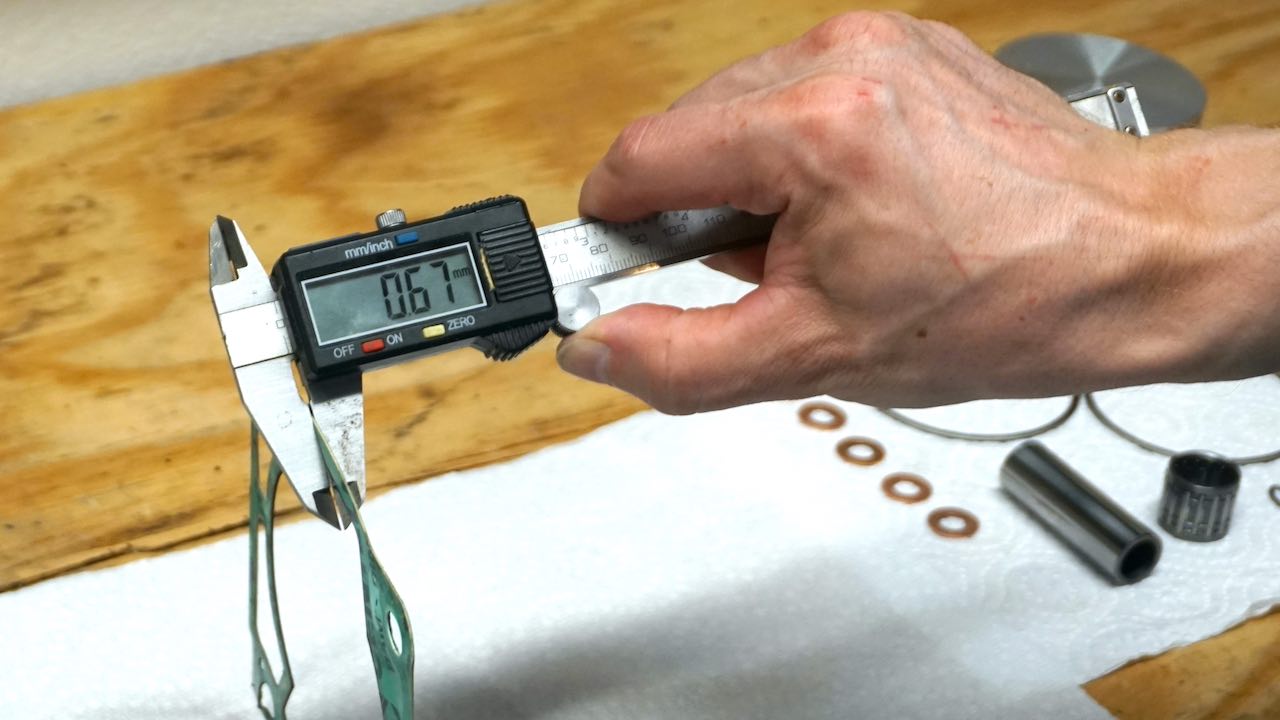
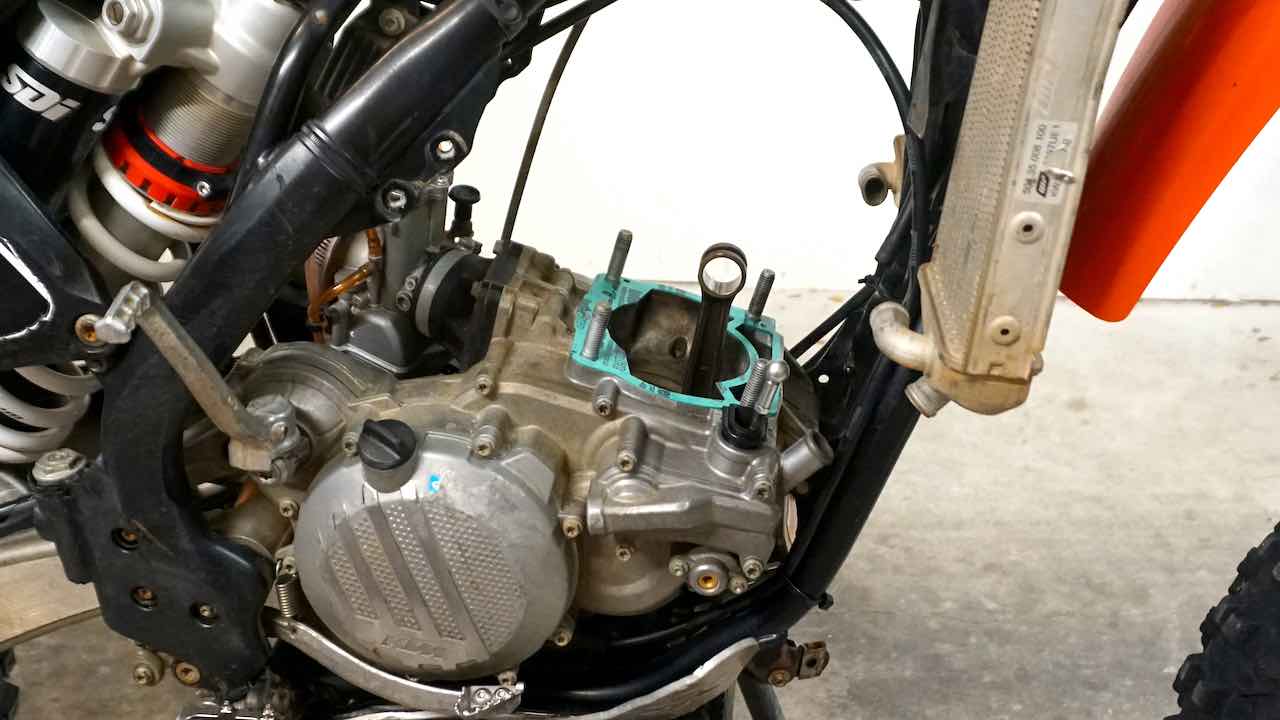
Next, install the new base gasket or gaskets on the motor. Carefully check the alignment to make sure it’s positioned the correct way.
Step 12: Install the New Piston
Now we get to put the new shiny top end rebuild kit parts back on the engine. Start by preparing the new piston on the workbench before the installation.
First, install the two new piston rings starting with the bottom one. Note that the piston ring has a small letter marking that indicates the correct position. This letter needs to be pointing up.
Carefully rotate the piston ring around the piston and insert it in the slot without bending the ring. Once the bottom one is in place, install the top one the same way.
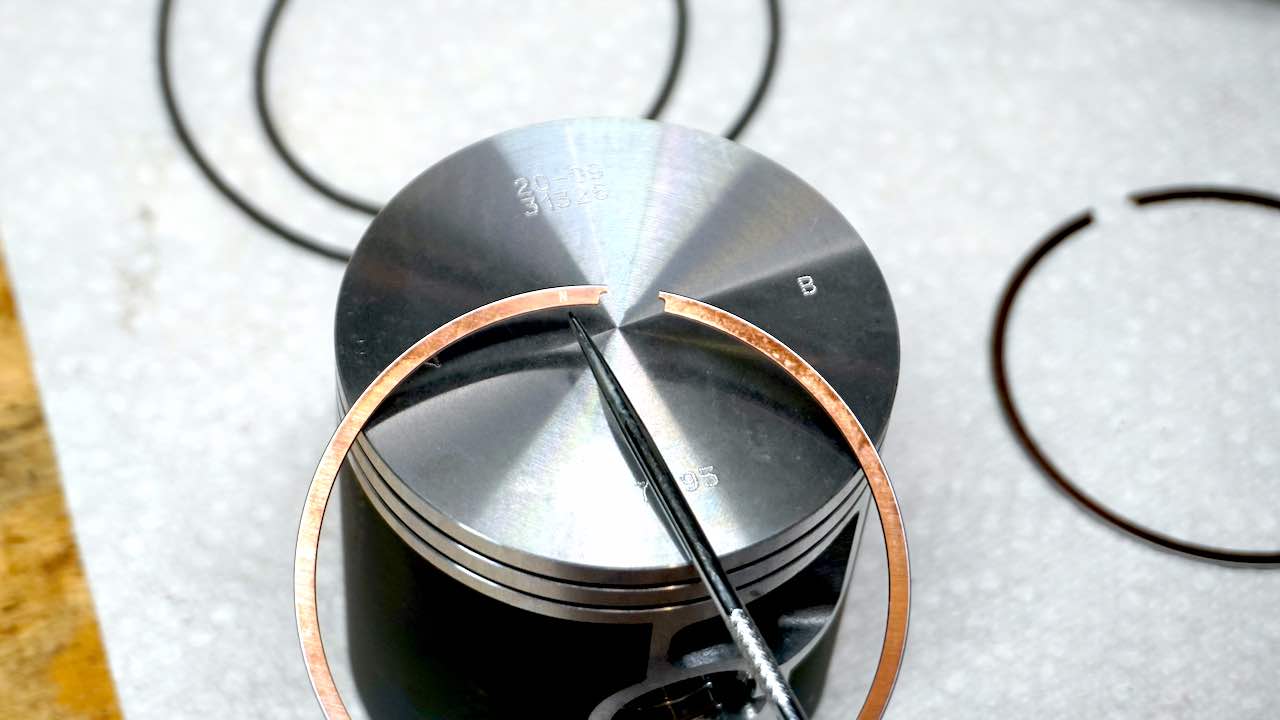
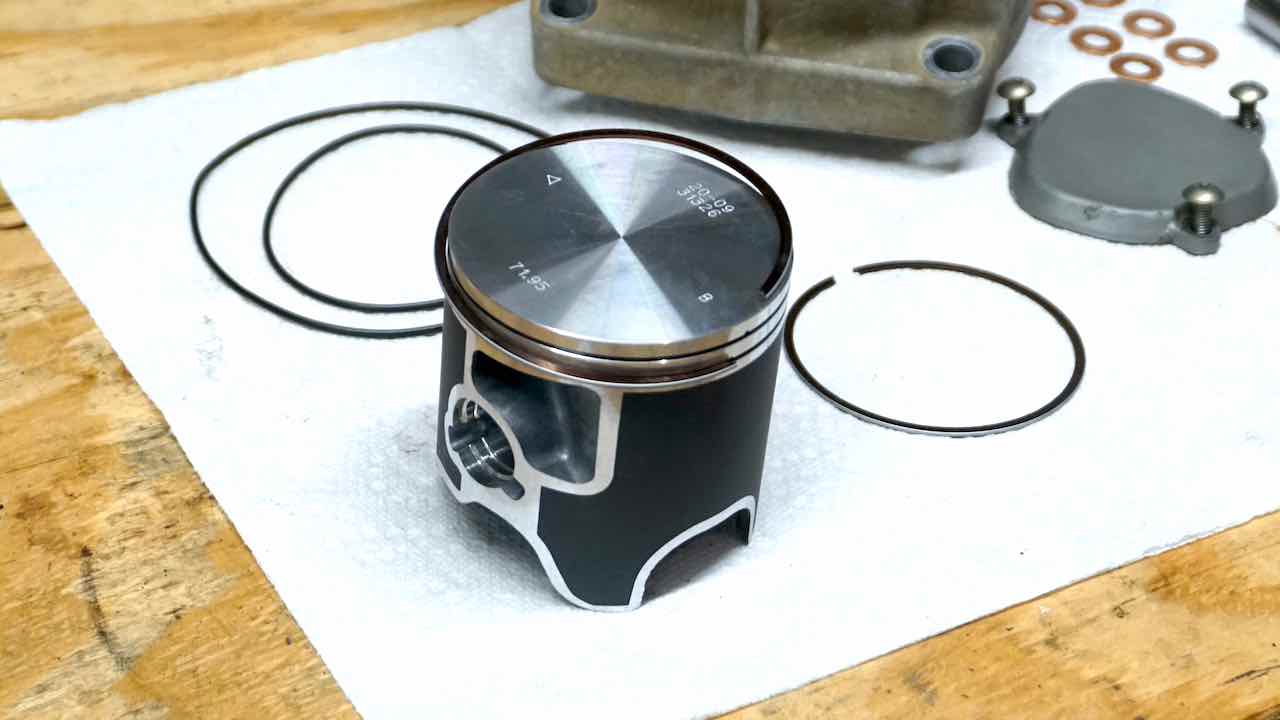
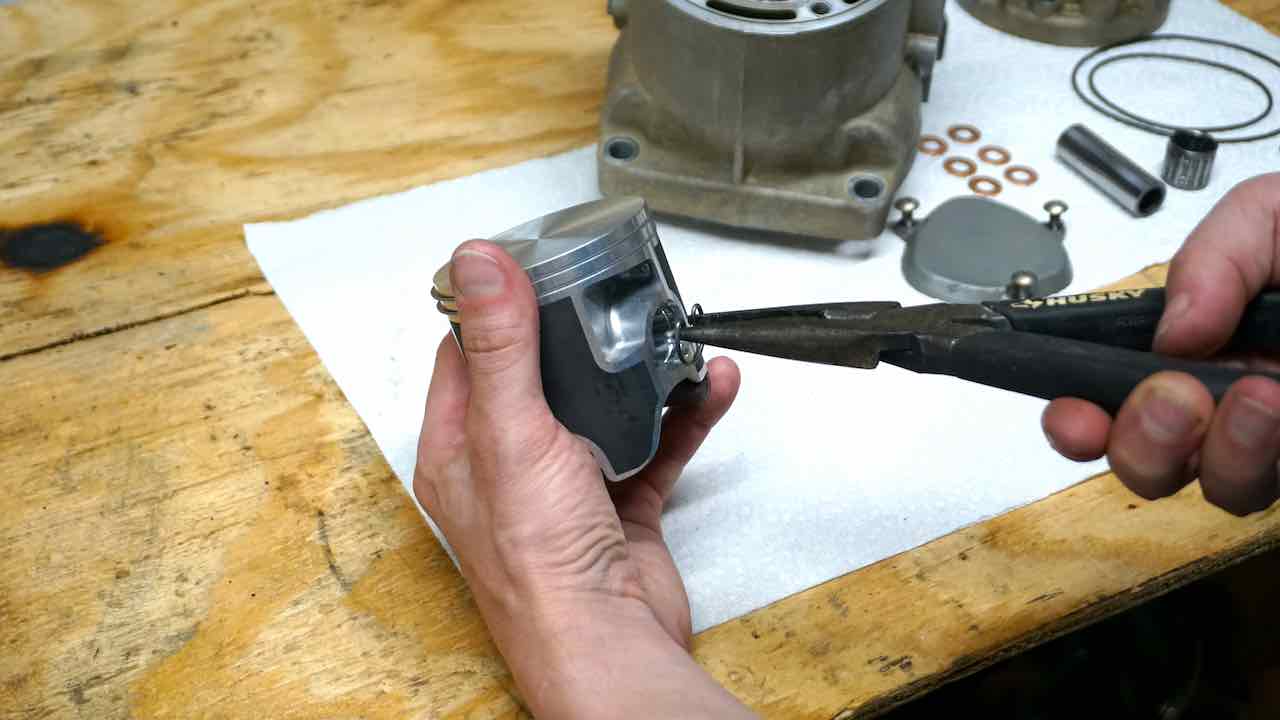
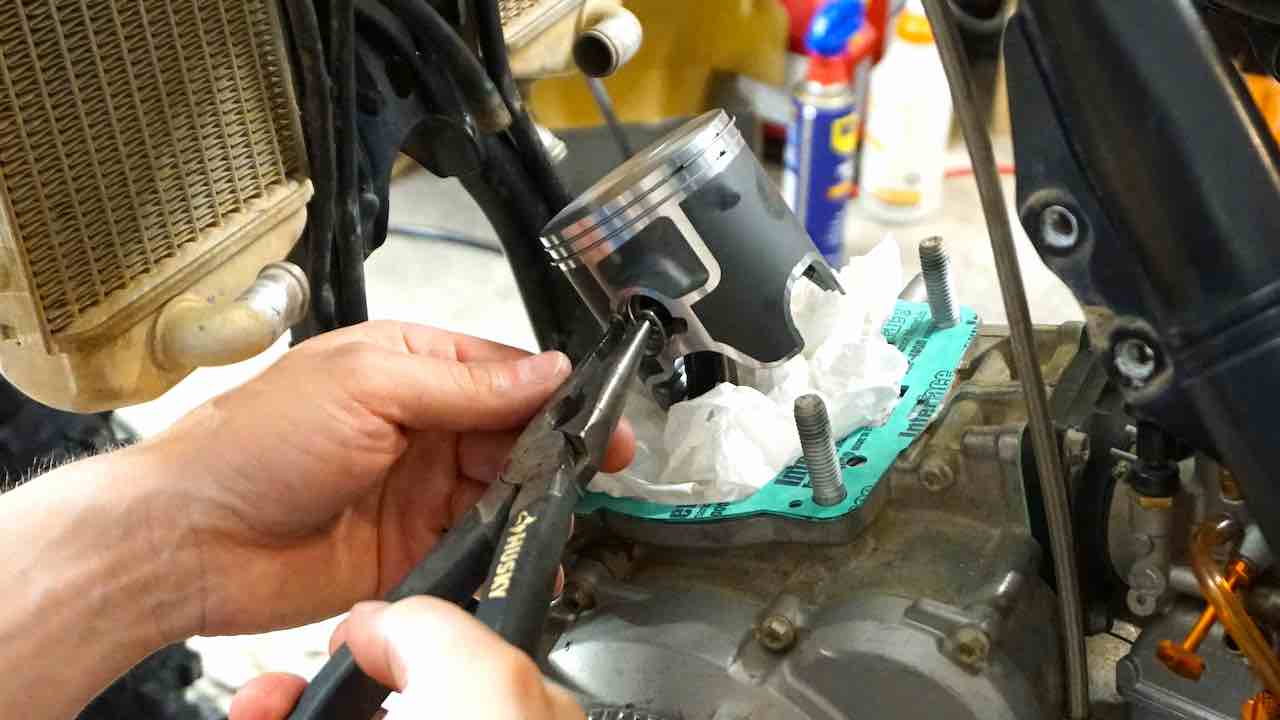
Insert the right side piston circlip in place. The Slavens EZ Clips come with loops that make the installation easy. Gently squeeze the loops with needle nose pliers and push the circlip into place. Do not insert the other circlip yet.
Slightly coat the new wrist pin with two-stroke oil and slide it half way in the piston from the opposite side (left side).
Note that the piston has a mark on the top describing the correct position. The triangle needs to be pointing forwards.
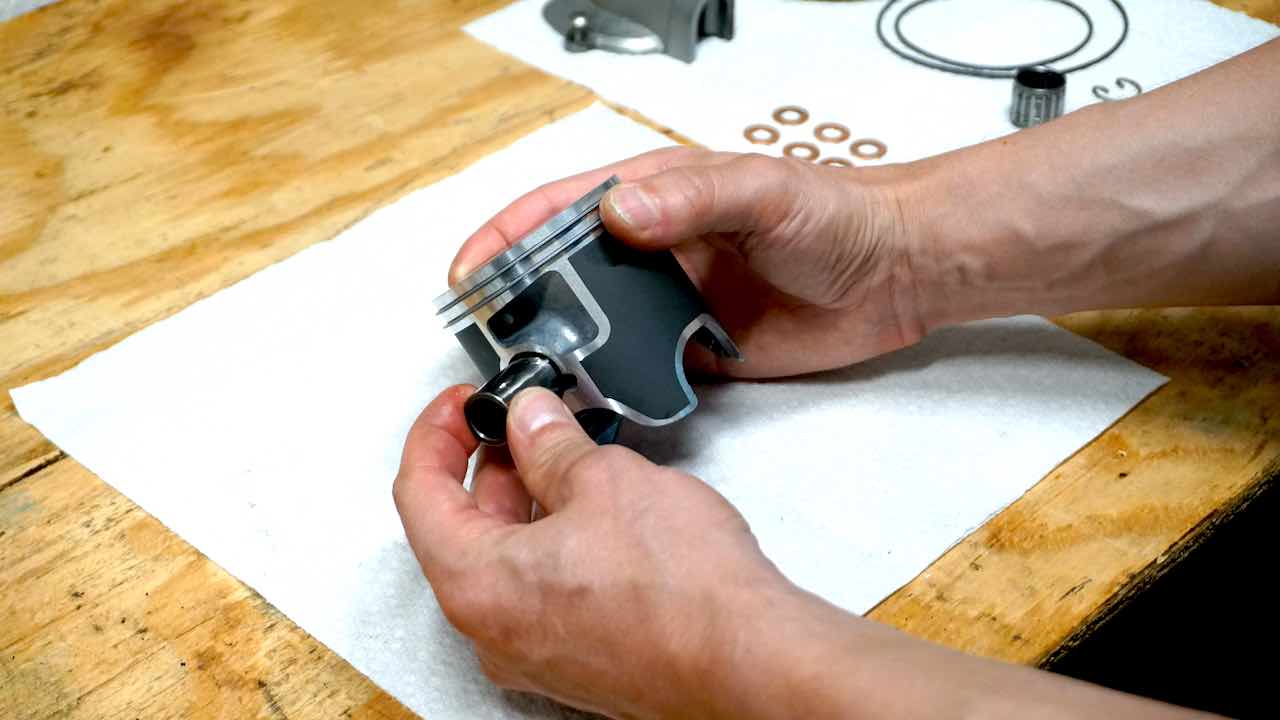
Coat the connecting rod bearing with some two-stroke oil and install it on the top end of the connecting rod.
Next, grab the new piston and insert it on the connecting rod by sliding the wrist pin in place.
The piston is easier to align, if you install the circlip on the right side of the piston and then push the wrist pin from the left side towards you and the circlip.
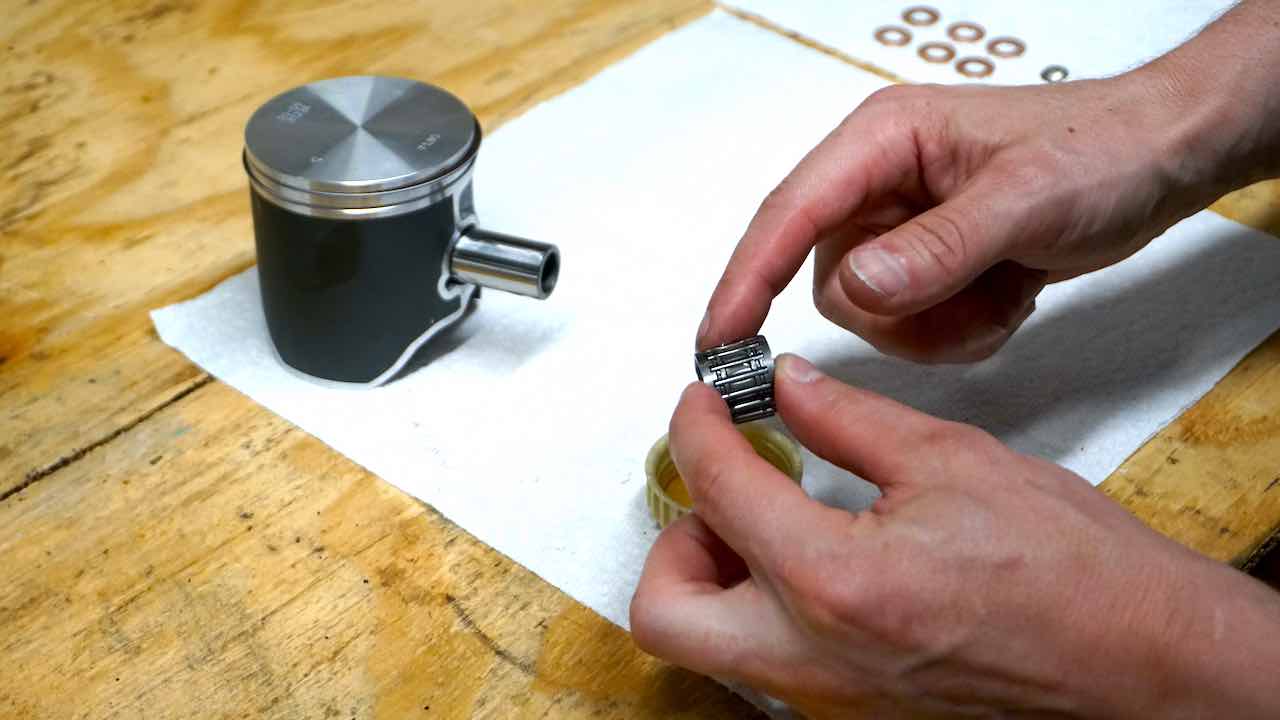
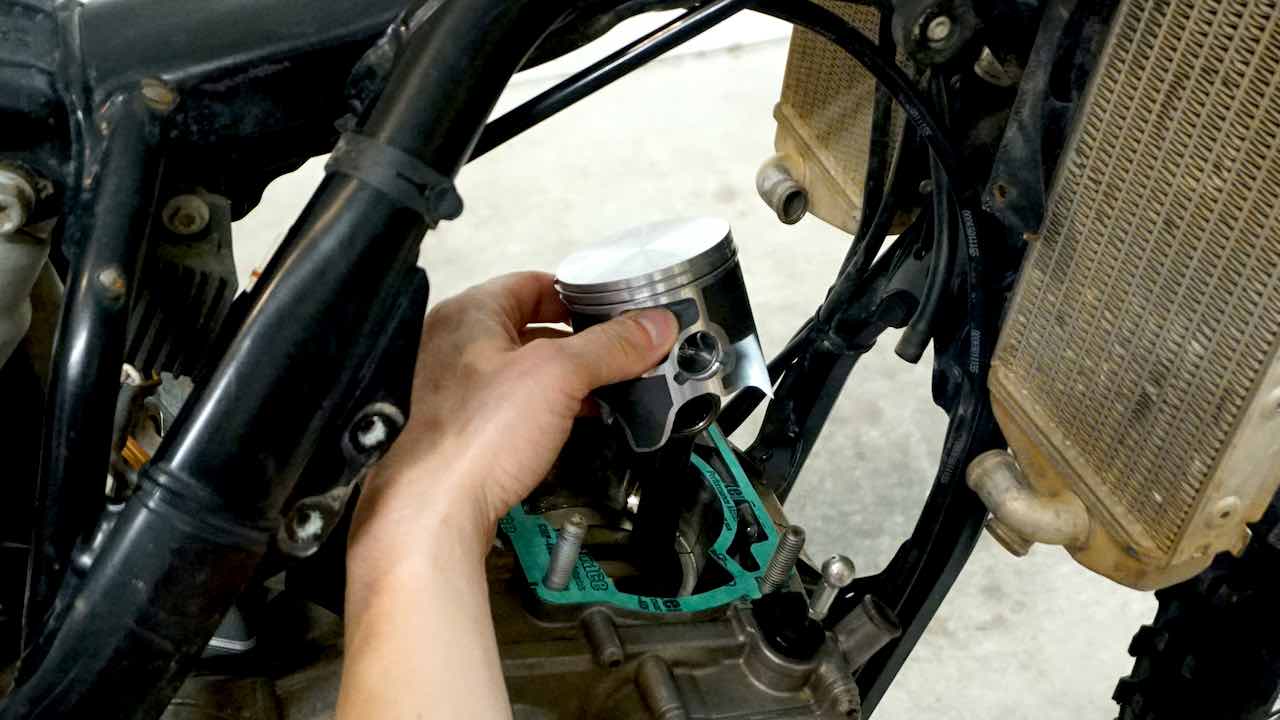
Once the piston is in place, insert the remaining circlip on the opposite side (that is the left side) of the piston to finish the piston installation. Again, gently squeeze the loops in the circlip with needle nose pliers and push it into place.
Step 13: Install the Cylinder
Before installing the cylinder back in place, check the following:
- The base gasket is installed to the correct position. It’s easy to invert and block important coolant channels if the base gasket is installed incorrectly.
- The piston is installed to the correct position and the position mark is pointing forward. Typically, the piston has a triangle shaped mark on top of the piston indicating the forward direction.
- The connecting rod bearing is replaced with the new one and is installed in place.
- Both piston wrist pin circlips are installed and fully seated.
- The piston is at the lowest position for easier installation.
After checking that everything is properly installed, it’s time to slowly slide the cylinder in place.
When the piston is starting to slide into the cylinder, you need to rotate the piston rings into position and squeeze them tightly around the piston. It is important to verify that the piston rings are correctly in place before sliding the cylinder down.
You should not need to use any force and the piston needs to slide in without any force.
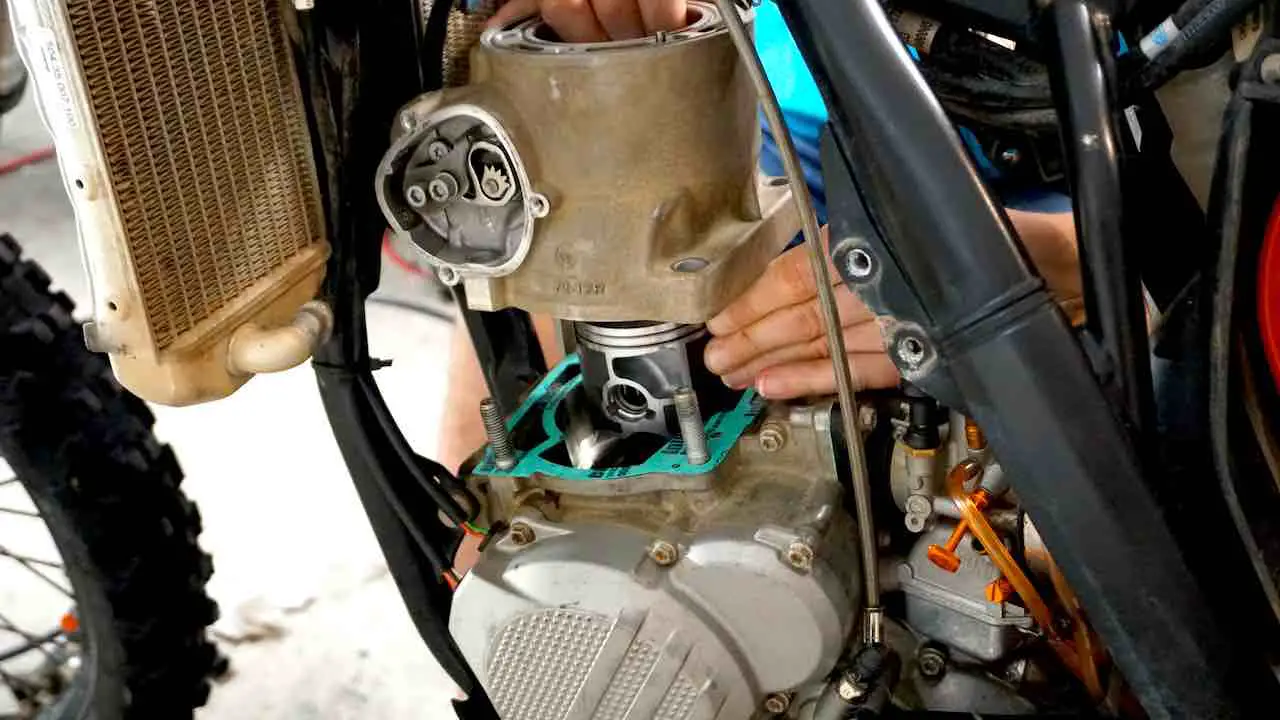
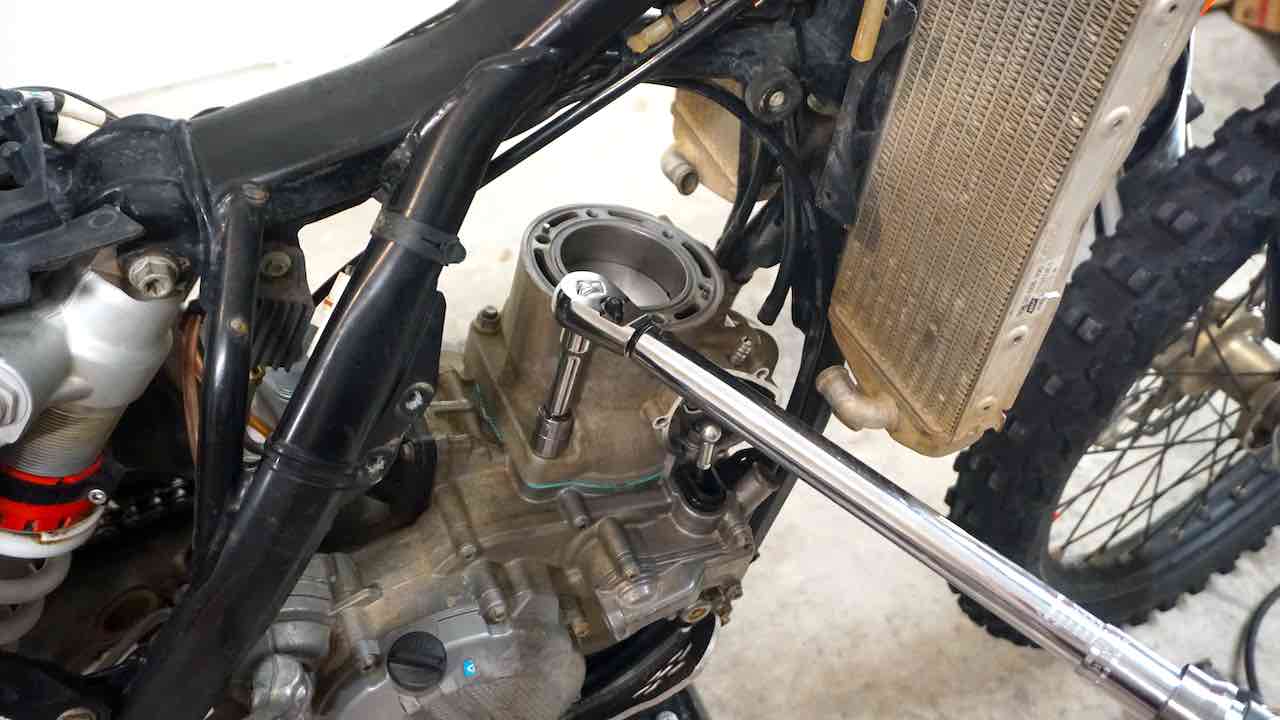
Next, insert the base bolts in place. Use blue thread lock for the base bolts and torque them to a correct tightening torque specified by the manufacturer. Make sure to evenly and slowly tighten each nut in a star pattern.
Step 14: Install the Cylinder Head
We are now ready to install the cylinder head in place.
Start by installing the two new rubber head gaskets in the cylinder. Next, slide the cylinder head in place. Make sure you have the two guiding pins in place.
Use the new brass bolt spacers and insert the head bolts in place. Next, slowly hand-tighten all bolts down. Then start tightening each bolt slowly in a star pattern about a quarter turn at a time until you reach the manufacturers torque specifications.
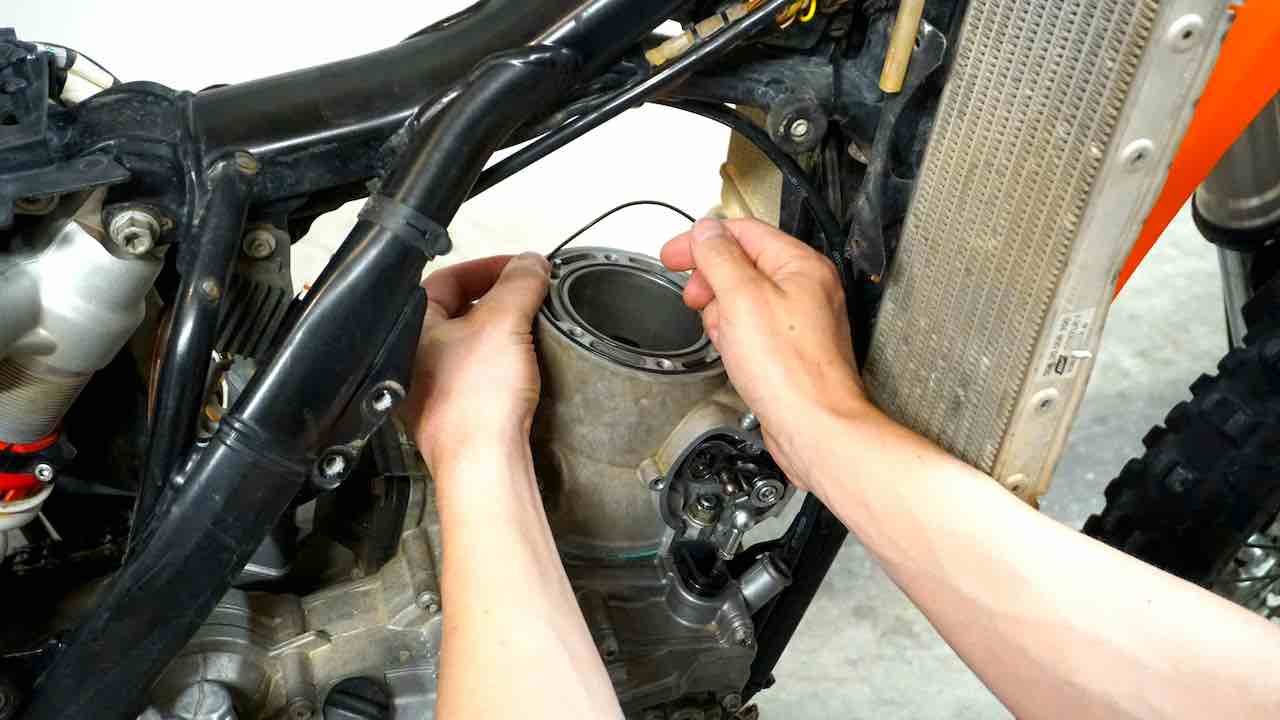
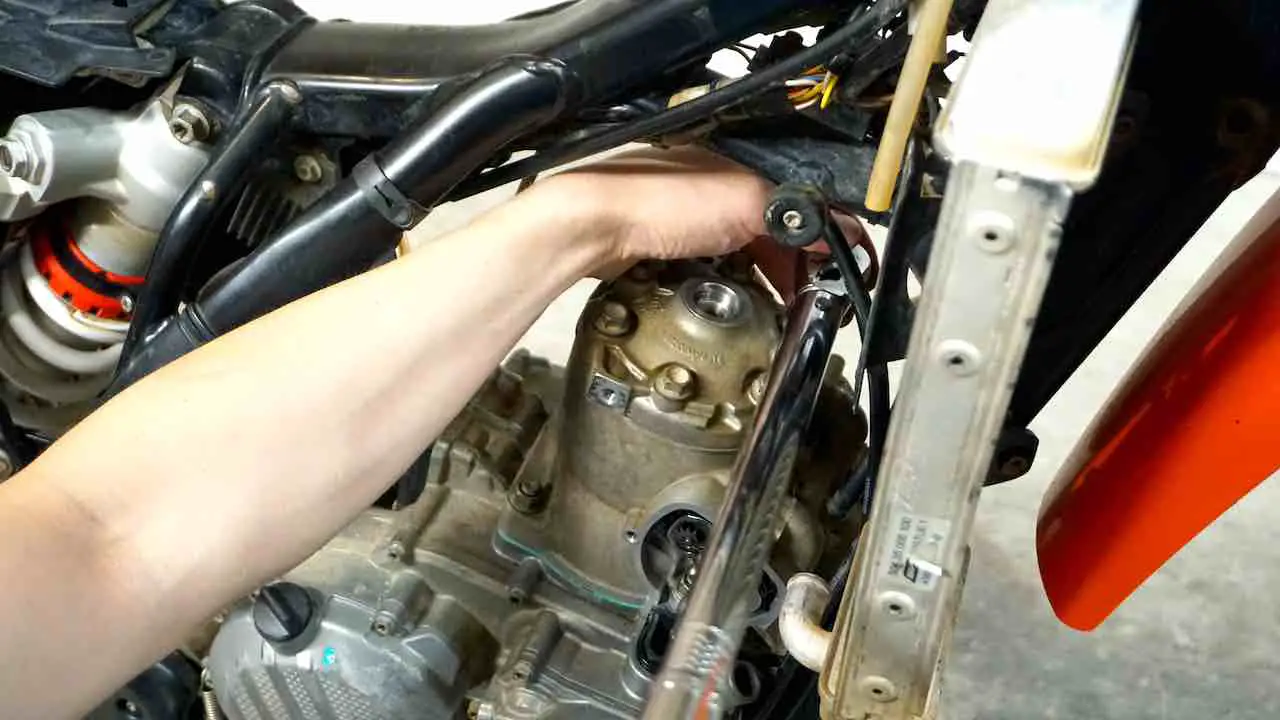
After installing the cylinder head in place, slowly turn the engine with the kickstart or by putting the dirt bike in 3rd gear and rotating the rear wheel. Check that the piston is moving correctly and without any issues.
Step 15: Reinstall the Power Valve Covers
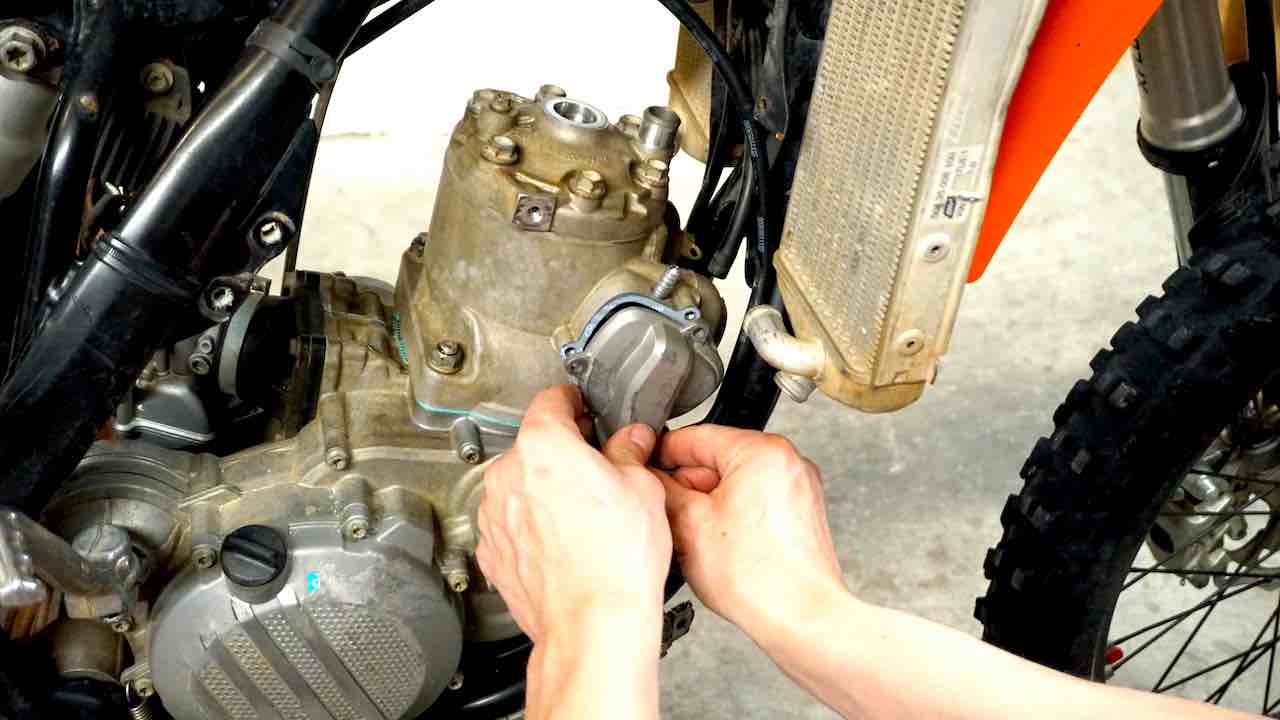
Before we can reinstall the power valve and complete the motor assembly of this top end rebuild, we first need to install the power valve cover gasket. You cannot install it after the power valve rod is in place.
After installing the new power valve cover gasket, cover the power valve push rod area with a paper towel. This way, you won’t accidentally drop tools or the circlip into the motor.
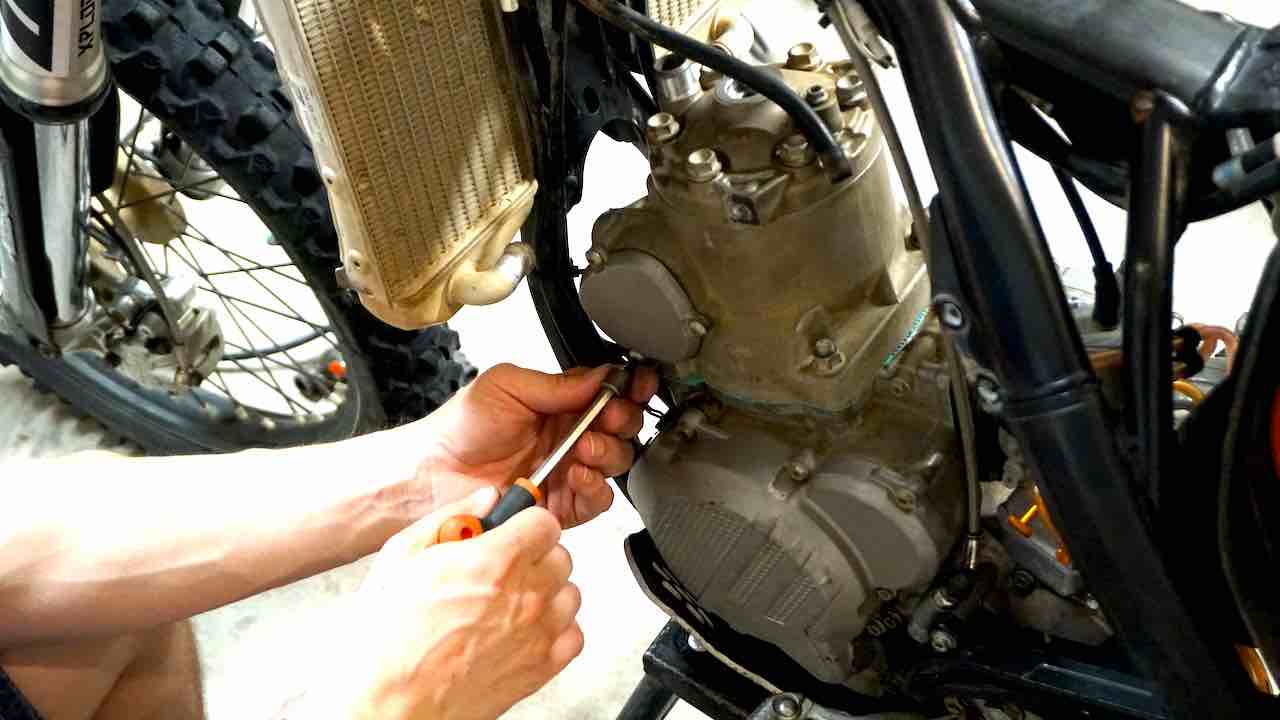
Next, push the power valve push rod into the ball joint. Then reinstall the circlip.
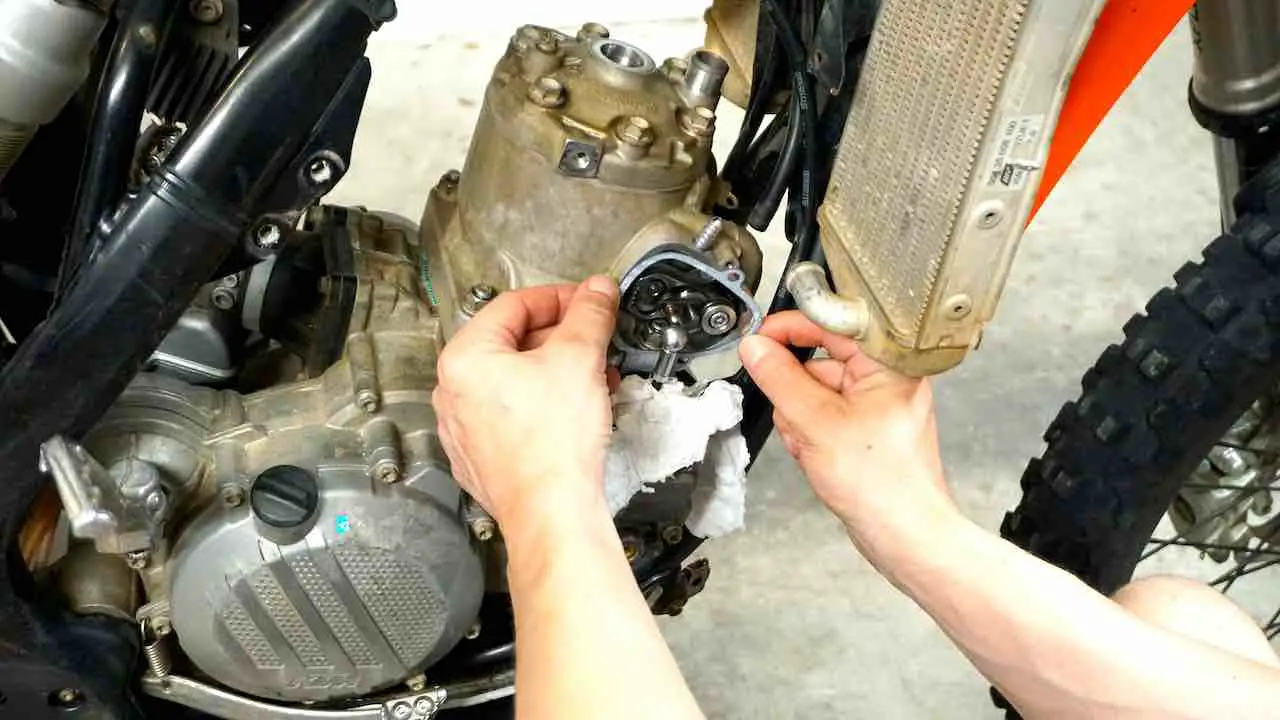
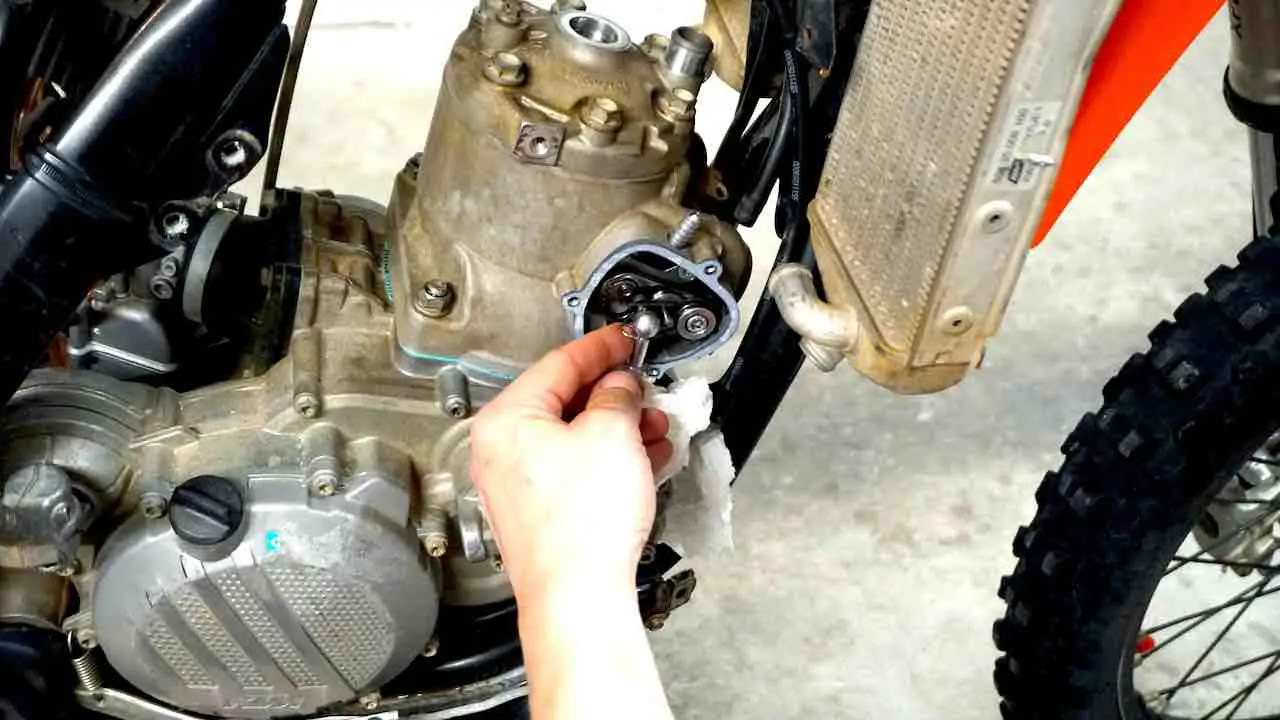
Install both side covers after the new power valve gaskets are in place. Be careful not to over-tighten the cover bolts as the lightweight covers can break easily.
Step 16: Reinstall Radiator Hoses and Refill Coolant
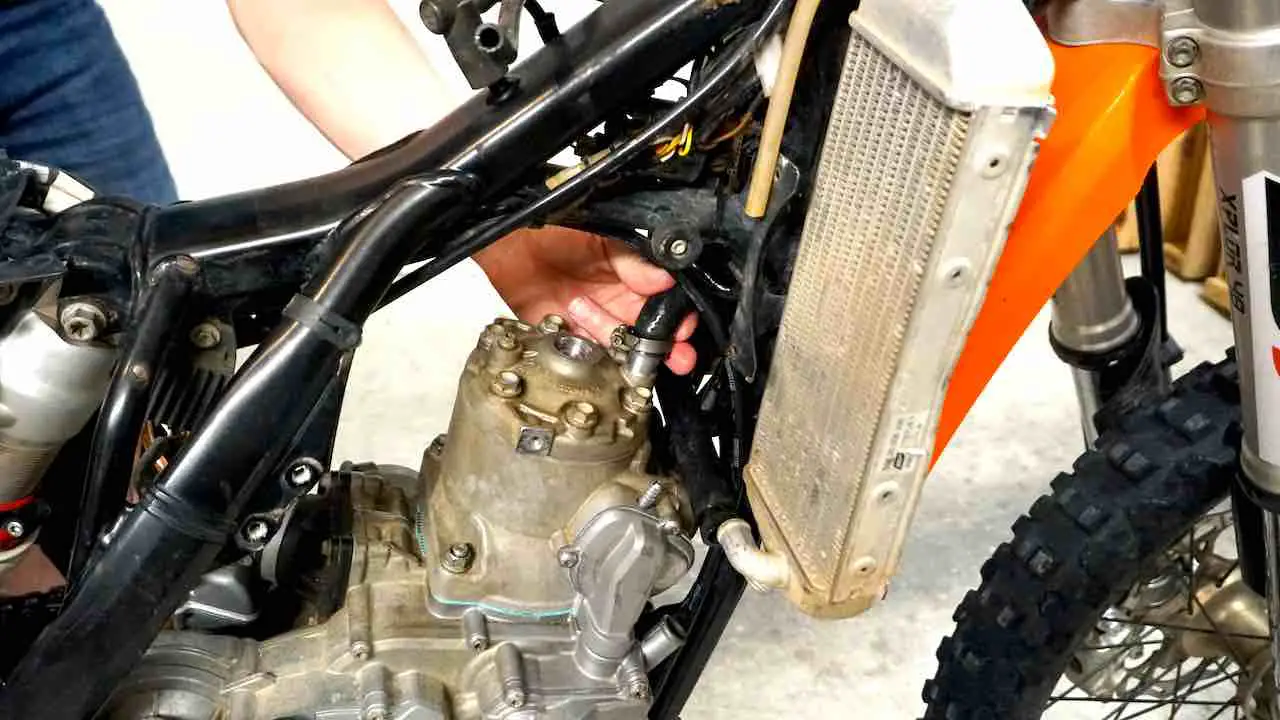
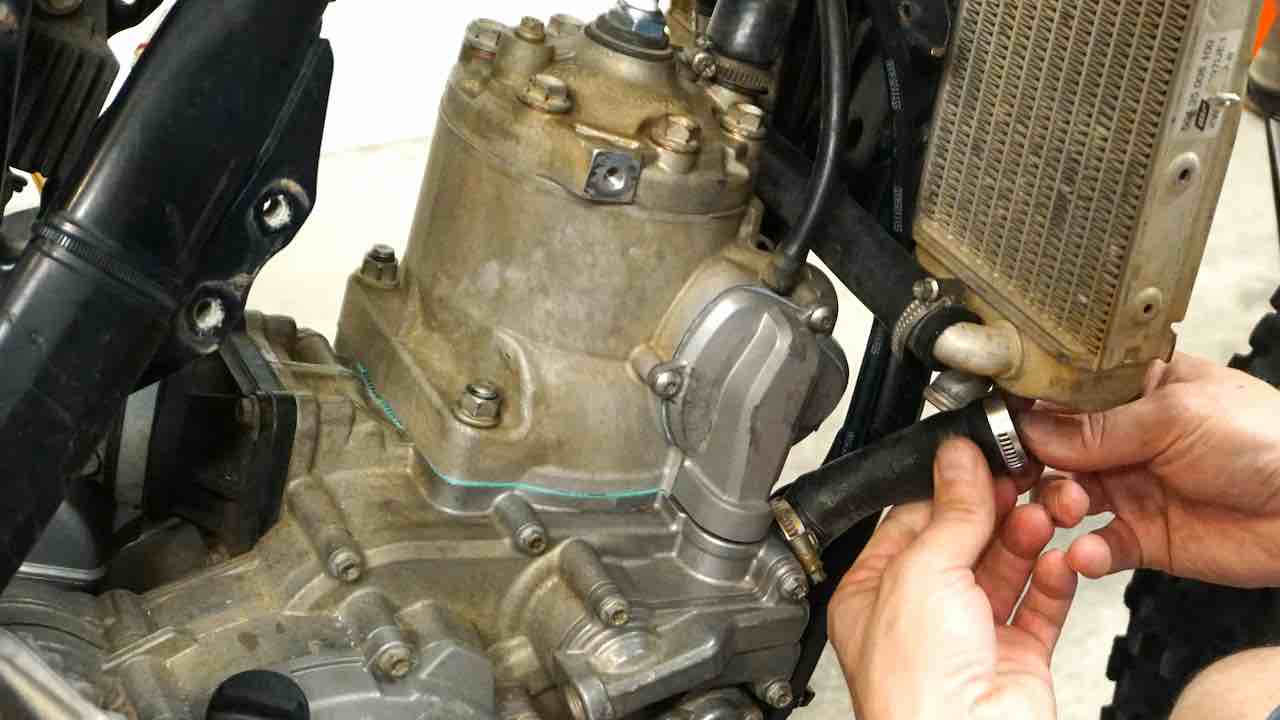
Now that the actual top end rebuild is complete, we need to reinstall the radiator hoses that we removed to get a clear access to the cylinder.
First, reinstall the radiator hoses on the top of the cylinder head. Then reinstall the connecting radiator hose between the two radiators.
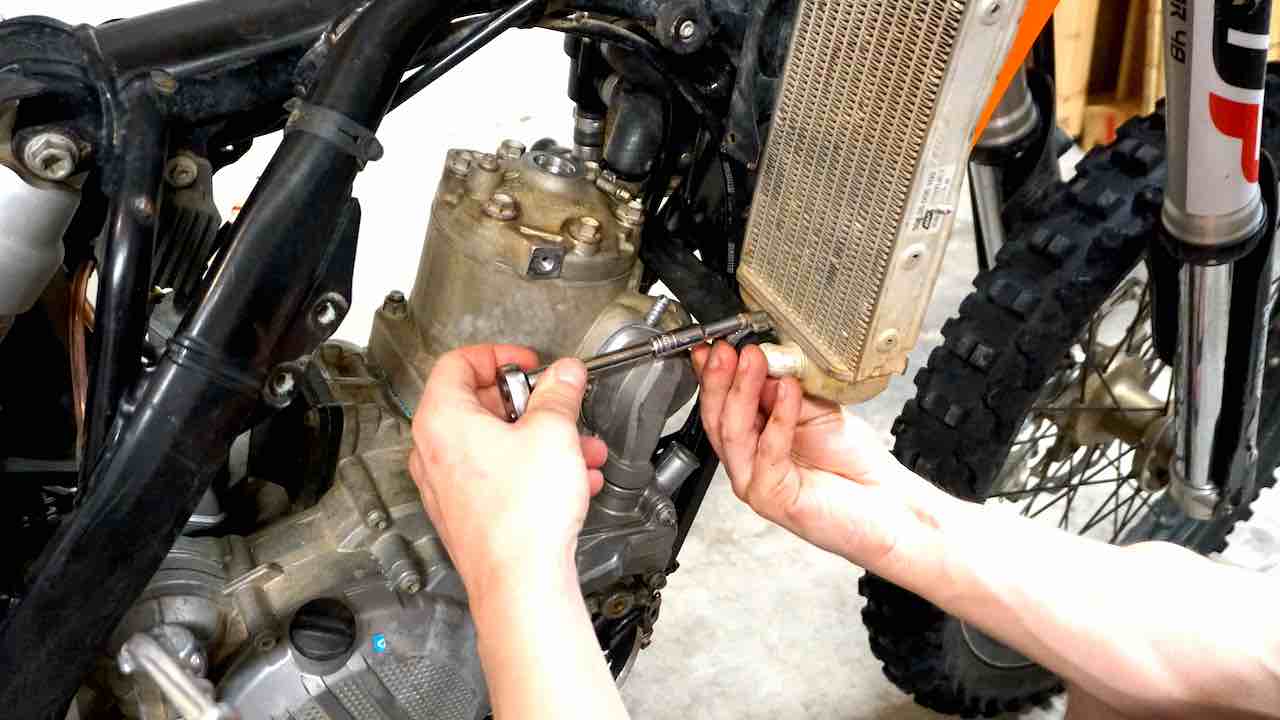
Next, continue with reinstalling the lower radiator hose.
After reinstalling all radiator hoses, refill the radiator with fresh coolant. If your dirt bike is boiling over or overheating, you should consider installing a radiator fan kit. The fan greatly improves cooling and helps to avoid overheating.
Step 17: Finish the Top End Rebuild
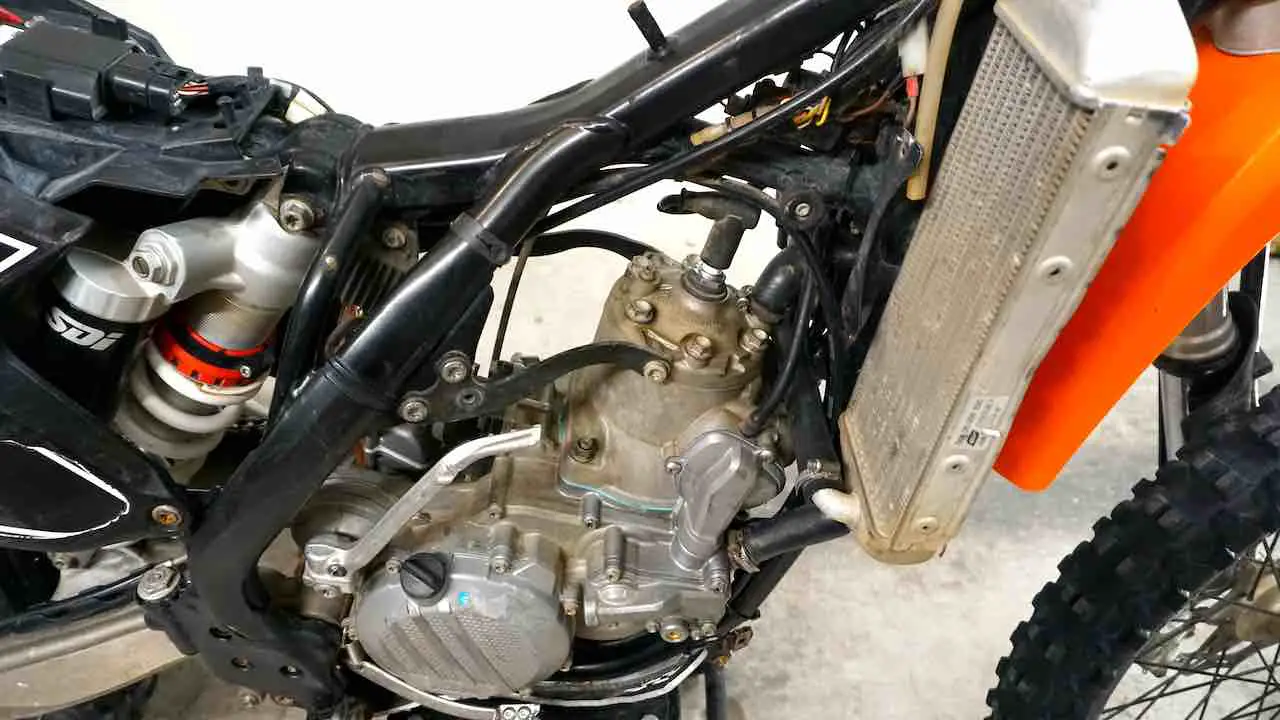
Finally, we can start reinstalling the remaining parts around the motor.
Reinstalling the parts in the following order should make the process smooth:
- Install a fresh spark plug and connect the spark plug in place.
- Install motor mounts on both sides.
- Reinstall the expansion chamber and tail pipe.
- Remount the radiator protectors.
- Reinstall the gas tank.
- Install the plastics.
- Install the seat.
Step 18: Final Inspection and Test Run
After the final assembly, it’s always a good idea to stop for a minute and complete a visual inspection.
- Are all the parts in place and used up?
- Did I tighten all nuts and bolts?
- Can I see any leaks or gasket issues?
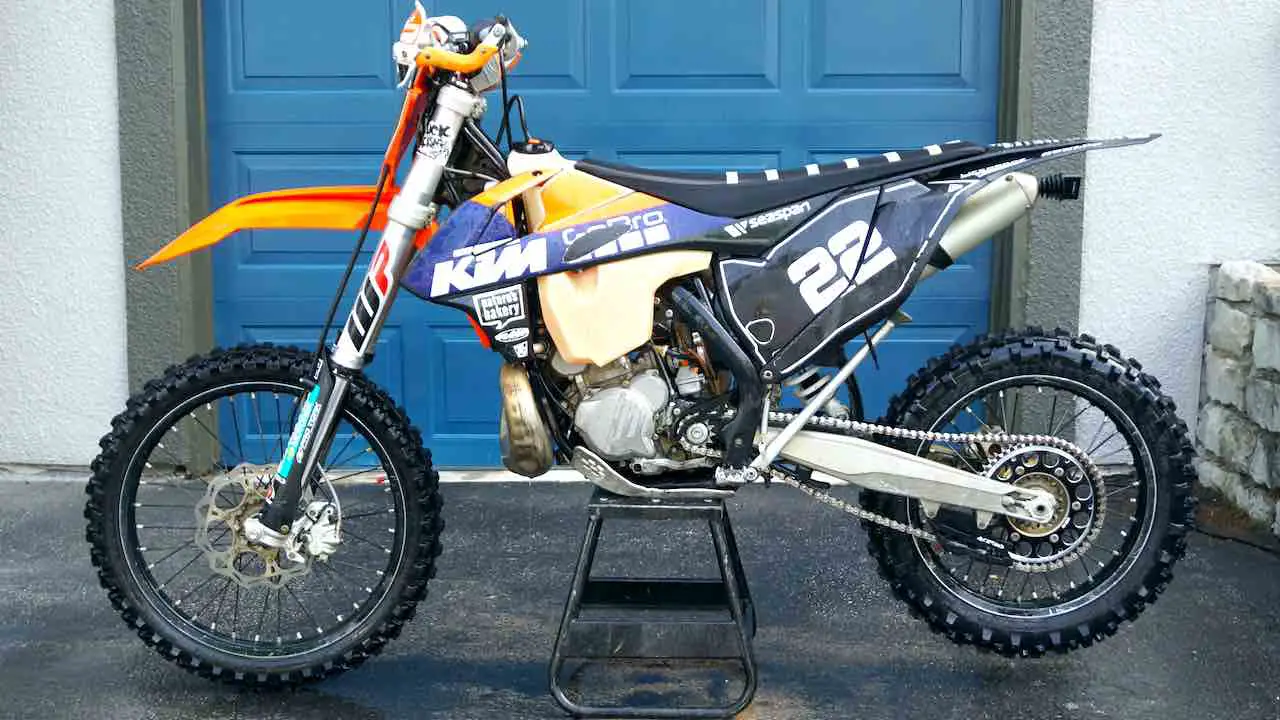
After a visual inspection, we are ready to start the dirt bike.
The dirt bike should start right up and have no issues or weird sounds. Let the dirt bike idle and avoid revving the dirt bike. Let it warm up slowly and let it cool down.
You are now ready for a test ride. Don’t forget to take it easy for the first few hours to let the new piston and rings marry with the cylinder.
How Do You Break In a Top End Rebuild On a 2 Stroke?
After finishing the 2 stroke top end rebuild, you should avoid higher revs and putting a heavy load on the motor for the first hour or so. Do not rev the engine when the engine is cold. Let it warm up idling first near operating temperature. This ensures that the engine is not overheating and has adequate time for the piston to find its final shape.
To avoid overheating, do not rev each gear to the max, rather shift up sooner. Avoid lugging with the engine, where the engine is near idle speed and almost about to stall. Gradually increase pressure and begin riding normally after the first hour.
Conclusions
While many may fear the 2 stroke top end rebuild process for the sheer amount of work involved, it is actually very doable for many gear heads out there.
By carefully following these step-by-step instructions, you will be able to complete a top end rebuild in most two-stroke engines. Trust us, it will be worth it and you will save a nice chunk of money in the process.
Now, let’s get shredding!
Read next:

