Learning how to change a dirt bike tire is a great skill. It means that you don’t have to call it quits if you break your tire during a riding weekend and it can save a ton of money for you over time. You can easily change a new tire at the camp—or back home if you forgot to bring a spare tire with you. It’s also a great way so save money as dirt bike tires wear out quickly.
In this post, you will learn how to change a dirt bike tire within an hour. In a nutshell, the process involves removing the wheel off the dirt bike, carefully removing the old tire off the wheel, cleaning the wheel, mounting the fresh tire, and reinstalling the wheel on the dirt bike.
In this article you will find out:
Next, we will explain the 6 steps involved in performing a dirt bike tire change.
Let’s get started.
This post contains affiliate links. If you use these links to buy something we may earn a commission at no additional cost to you. As an Amazon Affiliate we earn from qualifying purchases.
How To Change a Dirt Bike Tire in 6 Simple Steps
Many beginner riders many not know how to change a dirt bike tire or how easy it is to complete. Instead, they have their local shop change the tire for them, which may be costly. With practice, a regular tire change should take about an hour or less.
A flat protection solutions, such as the the Tubliss system or Nitro Mousse foam tubes adds another 15 minutes to the process, but the benefits easily out-weight the few extra steps required to install a fresh dirt bike tire.
Also, if you had a puncture, check out how to prevent flats or punctures or gain more traction for more tips and tricks.
We use Tubliss high pressure inner tubes on both the front and rear tire, which is the red inner tube seen in the pictures. Changing the dirt bike tire with a regular tube is identical to the steps below. However, if you are interested in extra tips for changing dirt bike tires with Tubliss or Nitro Mousse, check the end of this article.
Let’s begin.
Tools Needed for Changing a Dirt Bike Tire
Firstly, learning how to change a dirt bike tire begins with the tools needed for the work. The process to change a dirt bike tire is simple and straightforward itself, however good tools will make it even easier.
Below, you will find few necessary tools to successfully learn how to how to change a dirt bike tire:
- Wrench for removing and reinstalling the wheel
- Tire spoons kit
- Tire valve core tool
- New dirt bike rear or front tire (Check out our list of the best dirt bike tires for trail riding)
Thin, good-quality tire spoons make it easier to change the dirt bike tire. This is especially true with the Tubliss or Mousse tire protection system, since you need to avoid pinching the inner tube or damaging the foam.
Having two smaller, thin tire spoons and a third larger tire spoon will help put the new tire in place with ease. We listed our favorite tire spoon set above from Tusk and you can see us using them on the dirt bike tire change.
Naturally, you will also need a fresh dirt bike tire. Make sure to check out our instructions for choosing the best dirt bike tires for trail riding to learn what to consider when selecting tires. You will get great tips for choosing the best dirt bike tires for different terrains.
Step 1. Prepare the Dirt Bike for an Easy Dirt Bike Tire Change
First, let’s start with some needed preparation that will make is smoother and easier to change the dirt bike tire.
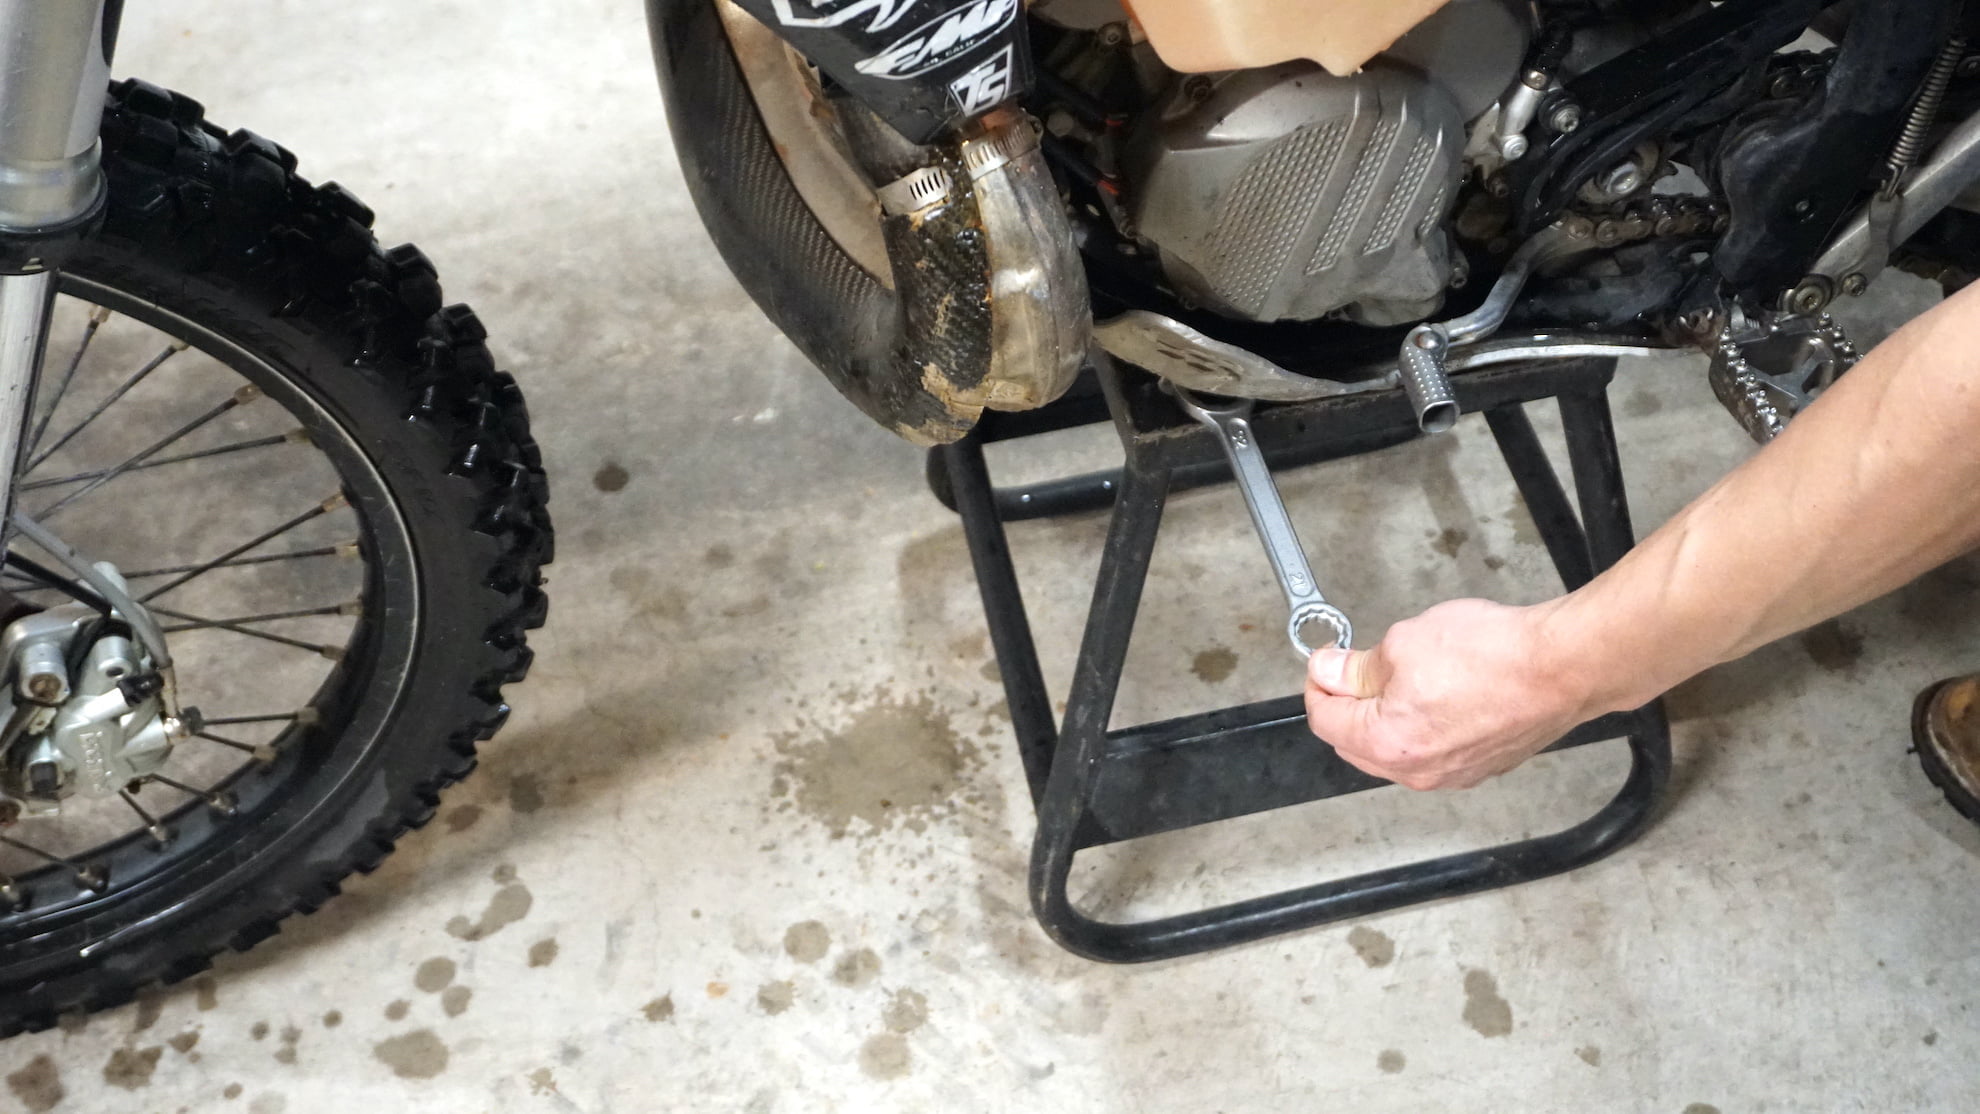
Start by washing the dirt bike and placing the dirt bike on the center stand. Make sure the tire you are replacing is off the ground and can be removed. If you’re changing the front tire, place a wrench under the skid plate so that it raises the front tire off the ground. The rear tire should already be free and off the ground.
Place the new tire in the sun or somewhere warm so that the sidewall will soften. This can really help a lot in the installation process as the warmer rubber will be more pliable and easier to install.
Prepare the tire changing area. If you have a dirt bike tire changing stand, you’re good to go. We use a stack of old tires, usually made of two or more tires, to raise the working area higher which makes the process much easier. This also works well if you need to replace the tire trail side.
Now, let’s start learning how to change a dirt bike tire.
Step 2: Remove the Wheel off the Dirt Bike
Next, lets learn how to remove the dirt bike tire and wheel of the dirt bike.
Remove the wheel by loosening the axle nut and removing the axle. Place the axle on a clean surface and clean it well. Next, regrease the axle with waterproof grease to protect it from corrosion.
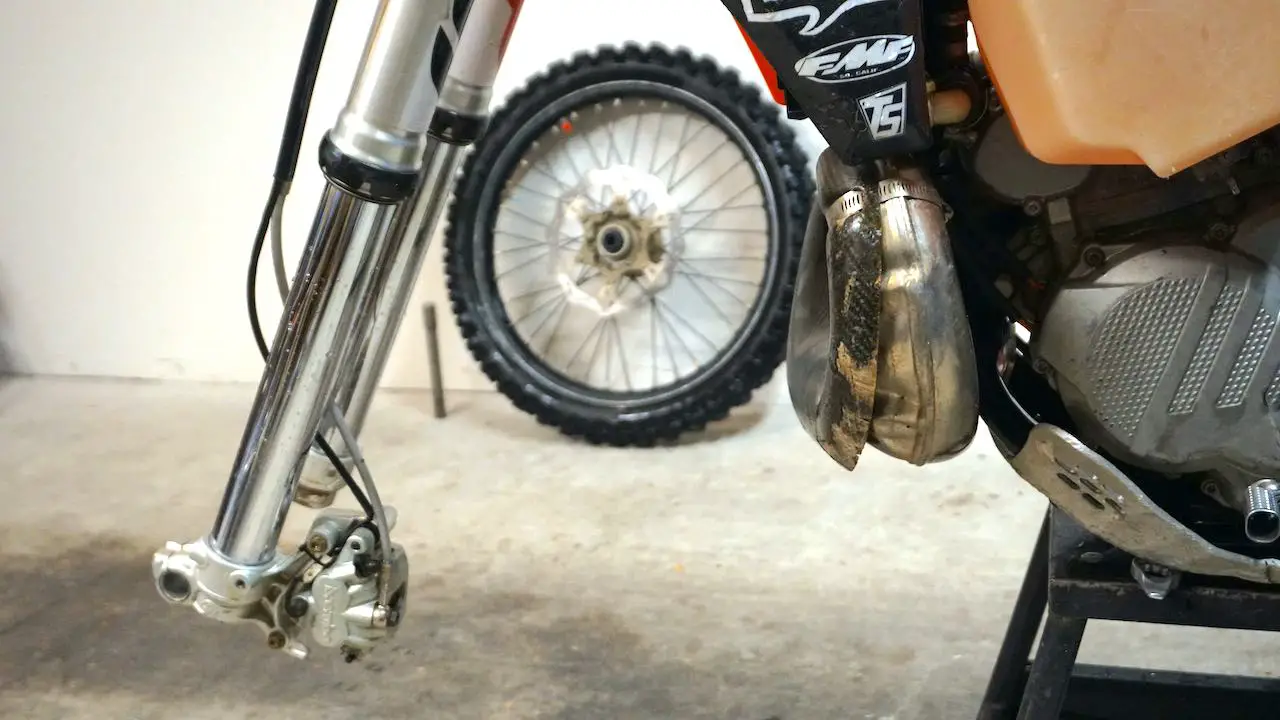
Additionally, push the brake pads in using a flathead screwdriver to create more space for the brake disc. This makes the installation easier after changing the dirt bike tire.
Step 3: Remove the Old Dirt Bike Tire off the Wheel
Next on how to change a dirt bike tire, you need to learn how to remove the dirt bike tire off the wheel or rim.
Removing the old tire starts with deflating both the tire and the inner tube. To do this, remove the tire valve using a valve core tool and let all air come out of the tire. Push the valve core tool inside the valve and rotate it counterclockwise until the valve core comes out.
Next, loosen the bead lock. It’s the nut around the tire valve. You do not need to completely remove the bead lock but, just loosen it well and leave the nut in place.
Continue to push the tire bead off the tire. The goal is to break the bead and push it towards the center of the wheel, so that you can make more space for the tire spoons and for the tire to come off the wheel.
Pro tip: If breaking the bead proves difficult, you can use clamps to squeeze both sides of the tire together and pop the bead off. Soapy water also helps to loosen the bead. If all fails, leave the tire somewhere warm, preferably to direct sunlight and let it heat up. Heating the rubber with a heat gun works also well in cold weather and makes the dirt bike tire changing process much easier.
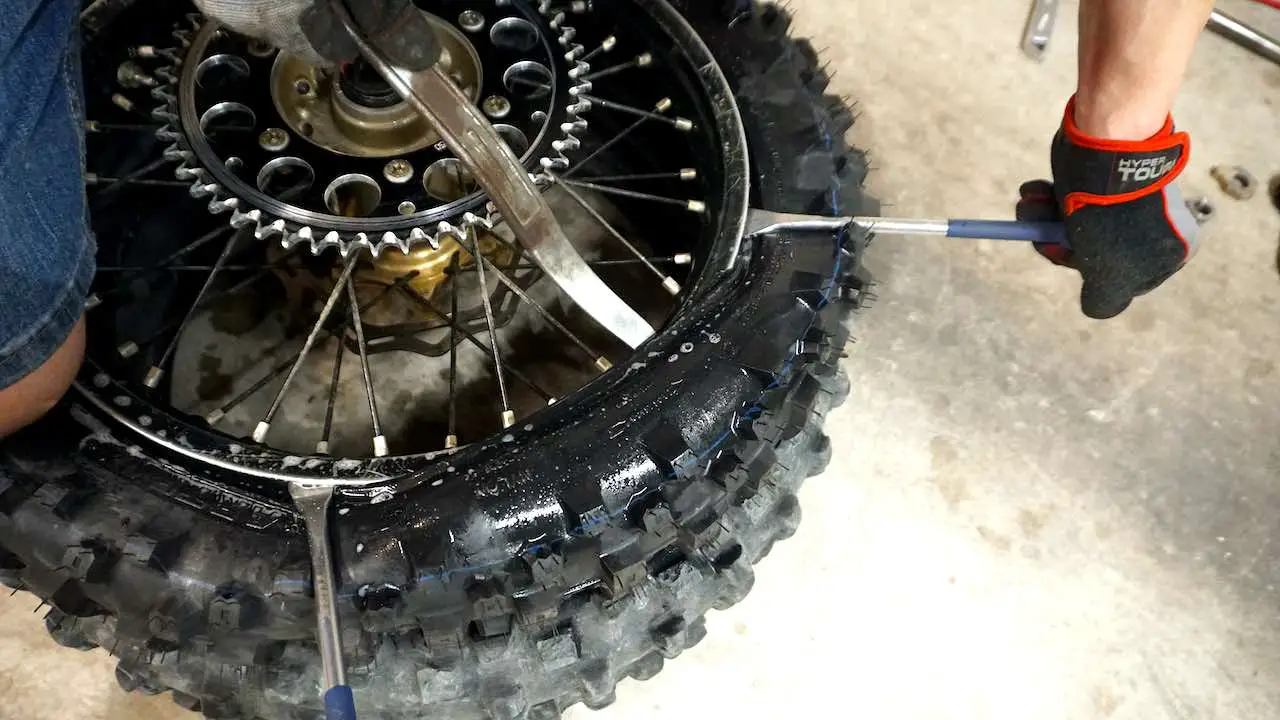
Next, start prying the old tire off by using the tire spoons, staring next to the rim lock. Work small sections at a time, carefully placing the spoons inside avoiding pinching the inner tube. Continue removing the bead until the wheel sits inside the tire bead.
You can lock each tire spoon under the brake disc or the rear sprocket. This makes it easier to work a larger area and enables using three or more tire spoons simultaneously when changing the dirt bike tire.
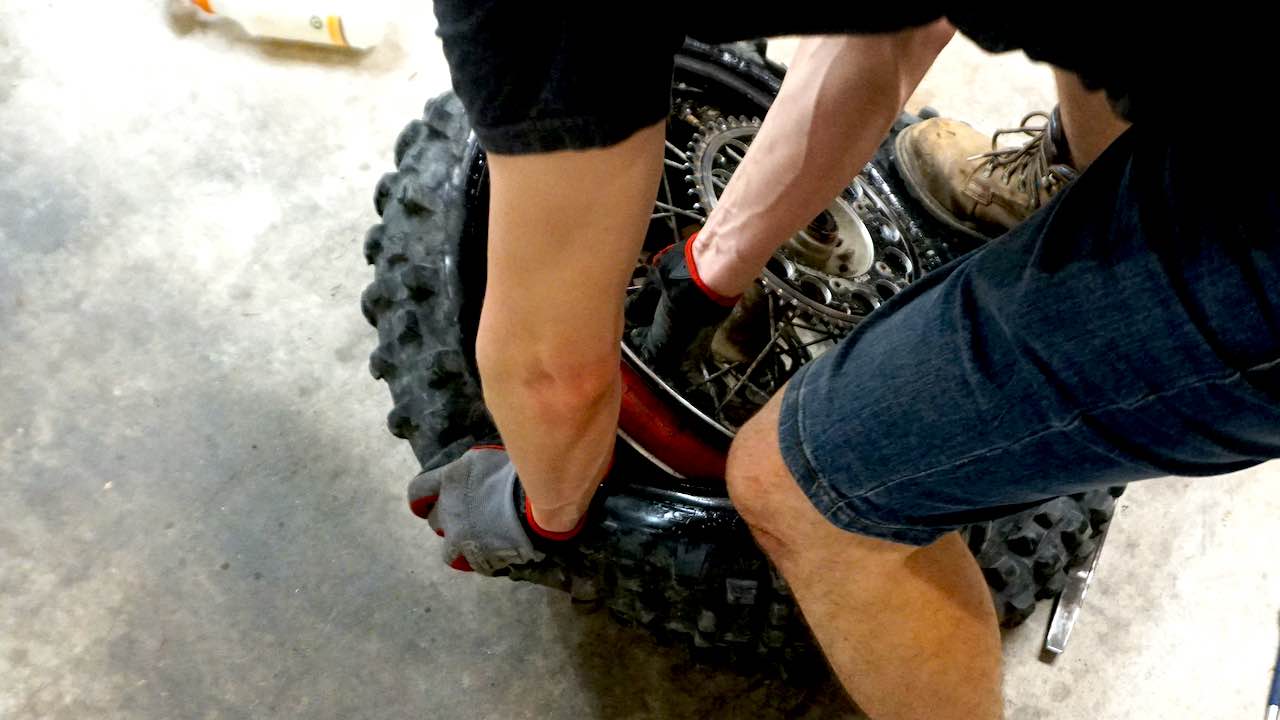
Next, turn the wheel around and complete the other side again starting next to the rim lock. Once you have removed the bead on both sides and the wheel is completely inside the tire, push down on the tire and pull the wheel off the tire. Again, you can use the larger tire spoon to help if needed.
Now that we have removed the worn out tire, we can focus on the wheel, inner tube or Tubliss system and check that things are ready for the new fresh tire.
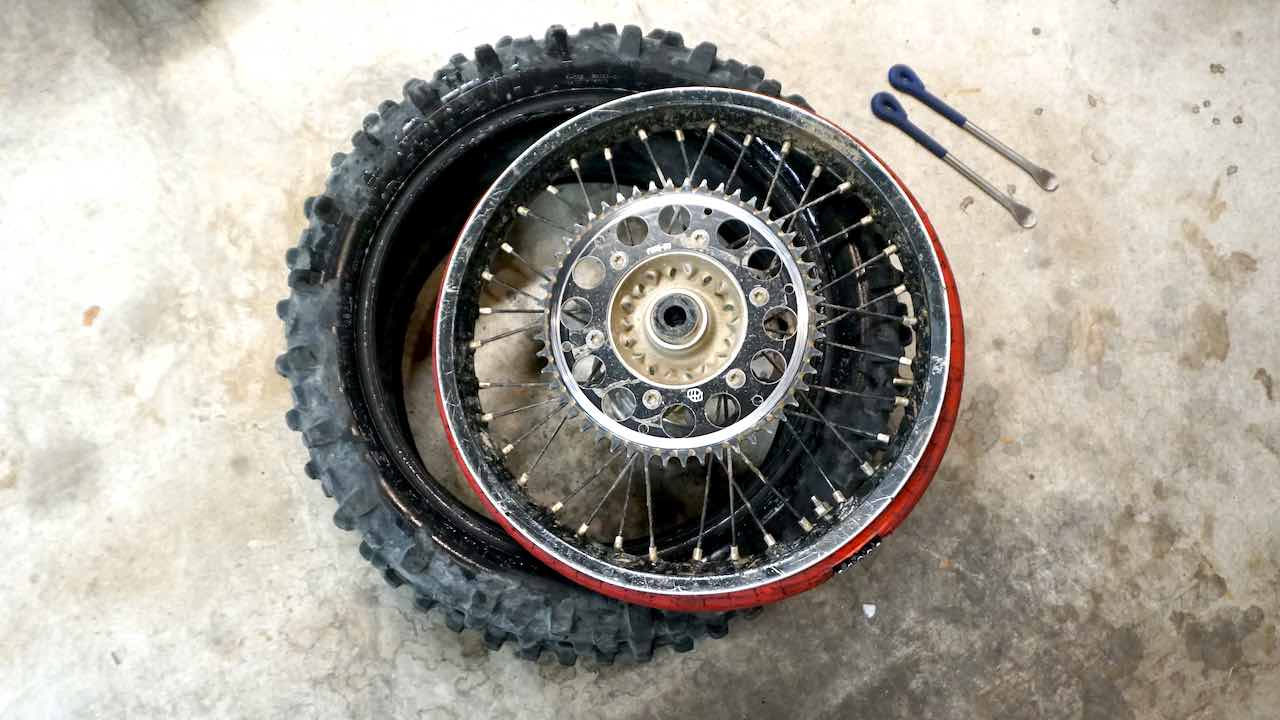
Step 4: Clean and Inspect the Wheel and Inner Tube
To ensure optimal results when learning how to change a dirt bike tire, it is essential to prioritize a clean wheel prior to installing the new tire. The dirt, worn off rubber parts and other debris can cause air leaks, and additional wear.
Each time you change dirt bike tires, it’s important to clean the wheel and the inner tube well.
Any dirt or sand inside the new dirt bike tire can potentially cause inner tube failures and other issues. When properly cleaned and installed, a stock inner tube should last through several tire changes, although punctures and snake eyes are frequent reasons for failed stock inner tubes in trail riding.
We recommend cleaning and washing the wheel and the inner tube during each dirt bike tire change. Typically, you will see small amounts of dirt or sand and some old rubber shavings inside the old tire and the wheel. Over time, this debris will cause issues.
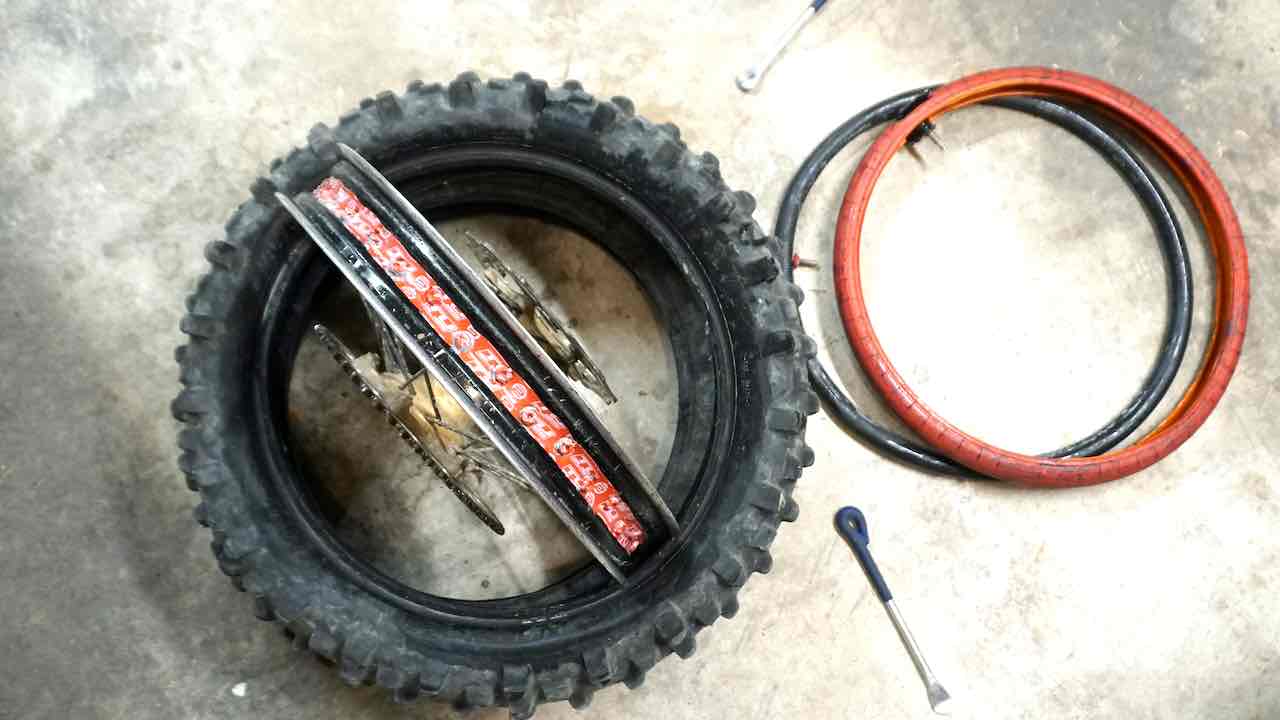
Once removed, give the wheel and inner tube a good scrub. Inspect the rim or spoke protection tape and replace if you see any issues with it.
Pro tip: We have used a regular Gorilla tape or duct tape if you don’t have actual rim tape available.
Step 5: Mount the New Fresh Tire on the Wheel
Installing the new tire to the wheel is similar to removing it. However, some beginners may feel that mounting the new tire on the wheel is the most challenging aspect of learning how to change a dirt bike tire. But fear not, as it is not as difficult as it may seem.
To make the dirt bike tire changing process easier, you can leave the tire out on the sun or some place warm so the rubber is more pliable and softer. You can also use soapy water with a spray bottle to lubricate the bead for easier installation.
First, push the wheel inside the new tire. Place the bead lock downwards and push it first in the new tire.
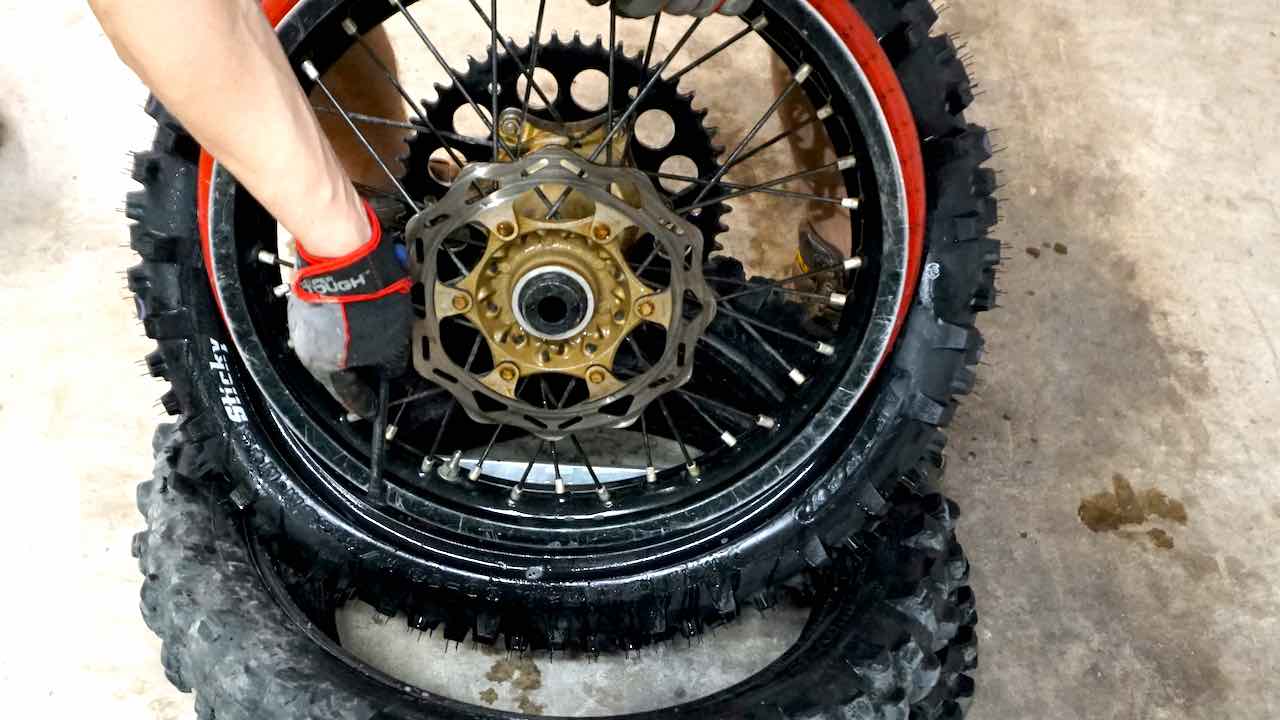
Next, use the tire spoons to slowly work the tire so that the wheel is completely inside the tire on both sides.
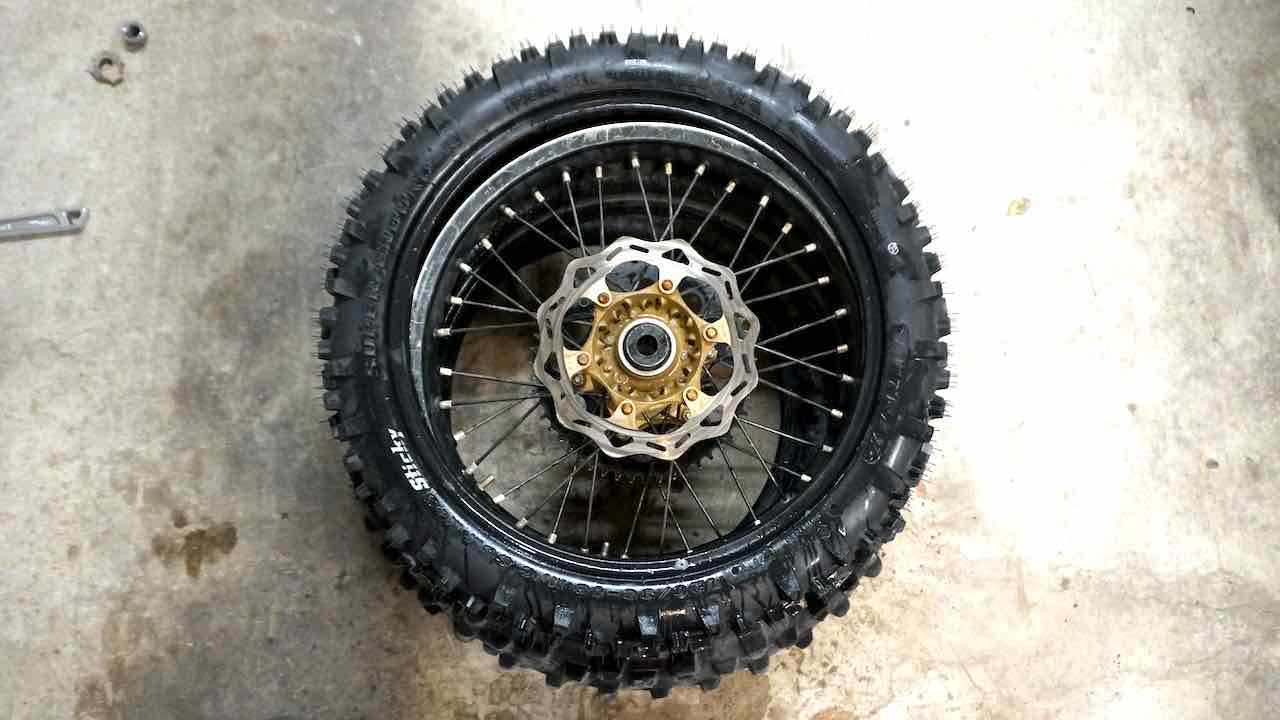
Once the wheel is inside the tire, push the bead onto the wheel using the tire spoons starting next to the rim lock. Push down with your knees to ensure the tire stays near the center of the wheel to create more space for the tire to move.
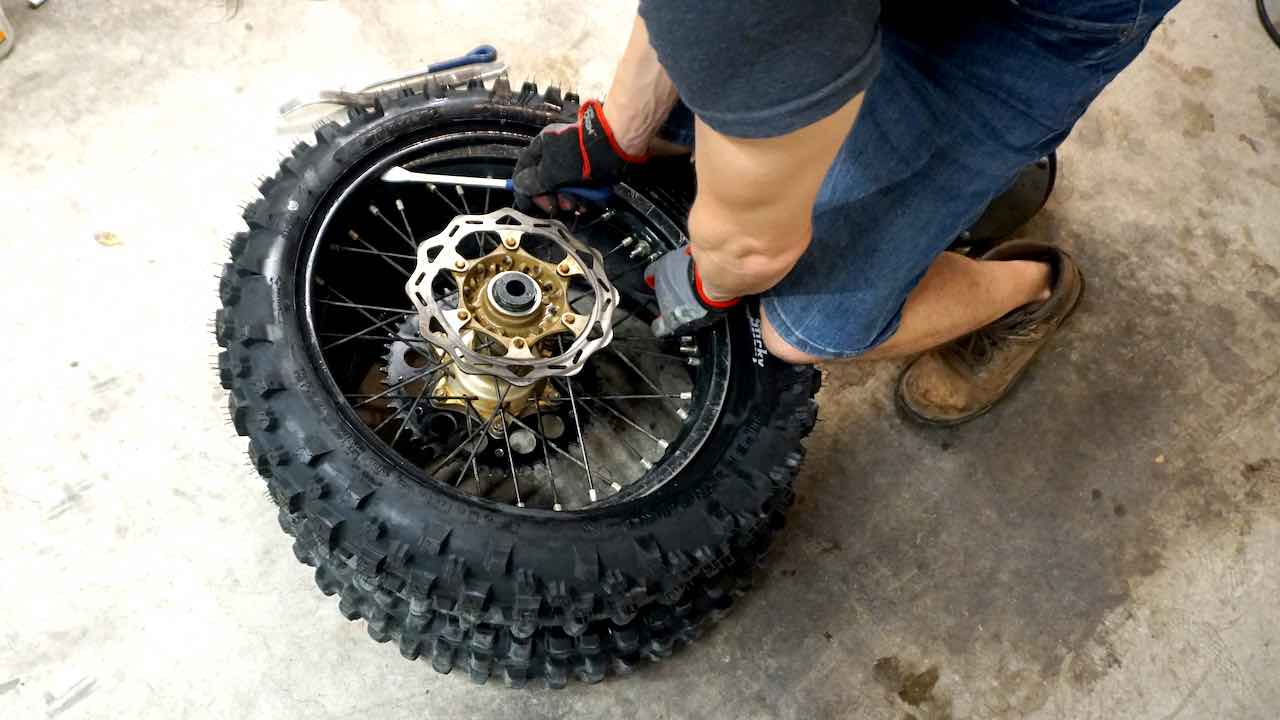
Continue working around the tire with the spoons to push the tire bead on the wheel. Move the spoon only 1 to 2 inches at a time, when the bead is getting more stiff. Be careful not to pinch the inner tube when inserting the spoon in. Keep adding soapy water to help with the installation.
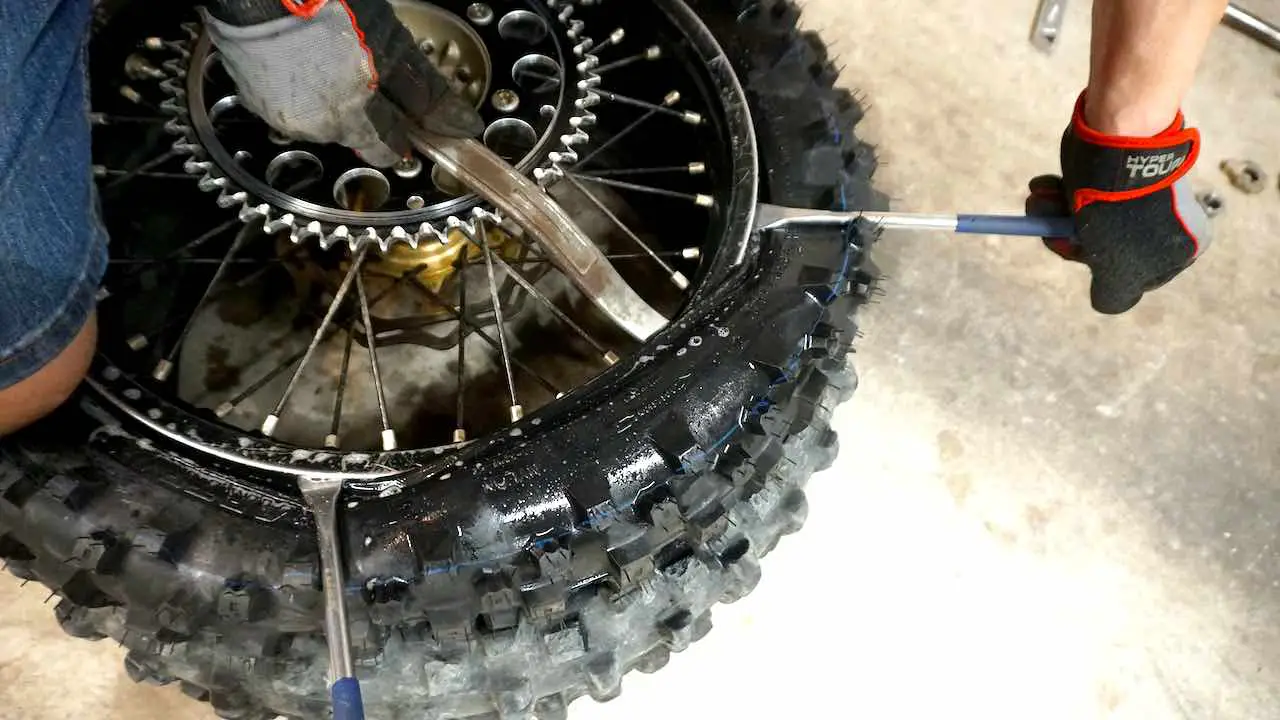
Repeat the procedure on the other side. The last 10 inches or so is typically the hardest to complete when changing the dirt bike tire to a new one. Using a thin set of spoons and going small sections at a time helps with the installation. Keep using soapy water during the installation to prevent tears and pinching the inner tube.
Once you have the fresh tire installed in place, reinstall the rim lock and tighten to spec. If you fail to set the bead lock, the tire may spin on the wheel and quickly rip the inner tube valve causing a flat.
Next, reinstall tire core valves and inflate the new dirt bike tire. Inflate the tire to 20 to 30PSI to make sure it is properly set in place and fully on the bead. This also helps make the new tire round and bounce back to shape after storage, transportation and installation.
Step 6: Reinstall the Wheel on the Dirt Bike
For the final step and completing the process of learning how to change a dirt bike tire; reinstall the fresh tire and wheel back on the dirt bike.
Check that the brake pads have enough space in order to make the installation easier. Don’t forget to lube the wheel axle to prevent corrosion.
When re-installing the front wheel on the dirt bike, make sure to align the forks properly to avoid suspension binding. We wrote detailed instructions on how to align dirt bike forks, so make sure to check it out.
Check the dirt bike tire air pressure and adjust accordingly. The front tire typically calls for 10 to 12PSI and the rear tire around 5 to 8PSI with the Tubliss setup, or around 10 PSI with regular inner tubes. The Tubliss inner tube needs no less than 100PSI at all conditions. Make sure to check it before each ride day.
Now the dirt bike tire change is complete and you have learned how to change a dirt bike tire.
Tips for Changing Dirt Bike Tires With Tubliss or Mousse
Learning how to change a dirt bike tire with regular tubes is easy. One you begin to add flat protection, the process is the same with few additional steps.
The Nuetech Tubliss is one of the options to increase traction and prevent flats. If you are unfamiliar with the Tubliss system, it’s definitely worth looking into. The system is very reliable and easy to install, while it still keeps the tire changing process easy.
The Tubliss system will last a long time. When properly cleaned and installed, they live through years and several tire changes. A clean inner tube is key for a successful installation and extending the inner tube lifespan.
We recommend cleaning and washing the Tubliss system during each dirt bike tire change. Typically, you will see small amounts of dirt or sand and some old rubber shavings inside the tire and on the Tubliss inner tube. Over time, this debris will cause issues.
It’s also good to notice that the tape under the inner tube needs to be checked and replaced periodically to make sure the sharp spoke ends will not puncture the inner tube filled to 100PSI.

Remove the red thick Tubliss tube and the small inner tube. You may need to use tire spoons. Be very careful when removing it not to nick or pinch the black inner tube. Use the soap spray bottle to lube the rim for easier removal.
Once removed, give the wheel and tubes a good scrub. Inspect the red inner tape and replace if you see any issues with it. We have used a regular Gorilla tape or duct tape when the Tubliss rim tape is not available.
Once fully cleaned, use the soap water again and install the Tubliss system back on the wheel. Check here for more detailed Tubliss installation instructions.
Frequently Asked Questions
How do I remove the old tire?
In a nutshell, the process involves removing the wheel off the dirt bike, carefully removing the old tire off the wheel using tire spoons, cleaning the wheel, mounting the fresh tire on the wheel, and reinstalling the wheel on the dirt bike. Follow the detailed steps in this post to complete the work within 60-minutes.
How do I inflate the tire to the correct pressure?
The ideal dirt bike tire pressure depends on the flat protection system you have, the riding style, the tire used and trail conditions. Start with 12PSI on the front tire and 10PSI on the rear tire. You can use a normal bicycle floor air pump. Check more tips for the ideal dirt bike tire pressure here.
What tools do I need to change a dirt bike tire?
You will find few necessary tools to successfully complete a tire change, such as: a wrench to remove the wheel, tire spoons and a valve core tool, an air pump and naturally you need a new tire also.
How to change a dirt bike tire at home?
Removing the old tire starts with deflating both the tire and the inner tube. To do this, remove the tire valve using a valve core tool and let all air come out of the tire. Push the valve core tool inside the valve and rotate it counterclockwise until the valve core comes out.
Next, loosen the bead lock. It’s the nut around the tire valve. You do not need to completely remove the bead lock but, just loosen it well and leave the nut in place.
Continue to push the tire bead off the tire. The goal is to break the bead and push it towards the center of the wheel, so that you can make more space for the tire spoons and for the tire to come off the wheel.
Are dirt bike tires hard to change?
No. With the correct tools you will learn how to change the dirt bike tire yourself within an hour. The process does not require lots of strength or force, it’s all technique.
Conclusions
Learning how to change a dirt bike tire is a skill all dirt riders should master. Active riders chew through the rear tires within weeks or few months and if you ride all year around, expect to go through several sets of tires.
As most dirt bike rear tires wear out around 20 to 50 hours or under depending on the rubber compounds used and the terrain and trails you ride in. Front tires may last a little longer, depending on your riding style and terrain. This means regular dirt bike tire changes.
Learning the correct techniques and methods when changing a dirt bike tire will help make the process easy and quick. Being able to change a tire trail side is also a great skill and can save a ride weekend.
Now, let’s get shredding!
Read next:

